
Unicorn cakes have become a popular choice for celebrations, captivating everyone with their vibrant colors, whimsical designs, and enchanting details. Whether for a child’s birthday or a magical themed event, these cakes add a special touch to any occasion, creating a fun and unforgettable experience. If you’re looking to create your own unicorn cake, there’s no shortage of inspiration to transform a simple dessert into a magical masterpiece.
In this post, we’ll share 10 easy unicorn cake ideas to wow your guests and add charm to your event. Whether you want a simple or dazzling design, these ideas will inspire a fun and delicious cake. Let’s dive into the enchanting world of unicorn cakes!
What Makes Unicorn Cakes So Magical?
Discover What Makes Unicorn Cakes So Magical? for more ideas that never go out of style
How Unicorn Cake Represent Magic and Fun
Unicorns have long been symbols of imagination and joy, capturing the hearts of people across cultures and generations. These mythical creatures, depicted as graceful horses with a spiraling horn, evoke wonder and enchantment, taking us to a realm where anything feels possible.
- Connection to Fantasy and Mythology: Unicorns have deep roots in fantasy and mythology. Their elusive, mystical nature has made them symbols of wonder and excitement throughout various cultures. They often appear in stories where the ordinary meets the extraordinary, sparking joy and imagination. From ancient myths to modern tales, storytellers often place unicorns in magical settings, like enchanted forests or sparkling meadows, where dreams come true and the impossible happens.
- Representation of Freedom and Possibility: Unicorns often appear as free, untamed creatures galloping through open landscapes, beyond the rules of reality. This freedom aligns them with the idea of boundless imagination and creative possibilities. The unicorn symbolizes carefree adventure, where anything can happen and magical worlds await, inspiring wonder and childhood dreams in people of all ages.
- Magical Powers and Mysticism: In many stories, unicorns possess magical abilities, often associated with healing, purity, or granting wishes. This portrayal highlights the unicorn’s magical horn, believed to purify water, heal sickness, and fulfill desires, This magical aura adds an element of wonder and hope, making unicorns symbols of optimism, healing, and joy. Their very existence, separate from the mundane world, brings a sense of happiness and possibility to the imagination.
- Appeal in Modern Culture: Modern popular culture celebrates unicorns as symbols of joy and whimsy. From children’s toys, TV shows, and books to marketing and fashion, unicorns have become symbols of fun and positivity. The colorful imagery of rainbows, glitter, and pastels reinforces unicorns’ connection to happiness, joy, and lightheartedness. Unicorns represent an escape from everyday life, providing a playful and imaginative experience for all ages.
- Joy through Color and Fantasy: Unicorns’ vibrant, rainbow-colored depictions symbolize joy, with bright hues and their magical nature sparking childlike wonder and excitement. Unicorns embody an escape to a magical world where beauty, fantasy, and playfulness reign.
In conclusion, unicorns are not only creatures of beauty and magic but are potent symbols of imagination, freedom, and joy. Unicorns remind us of the magic in our imaginations, encouraging us to embrace whimsy and fantasy. Whether a symbol of purity or playful fun, they hold a timeless place in the hearts of dreamers.
Why Unicorn Cakes Appeal to Kids and Adults Alike
- Universal Appeal of Whimsy and Magic: People widely see unicorns as symbols of magic and fantasy, appealing to all ages. For children, unicorns represent the enchantment of childhood—fantastical creatures that exist in stories, movies, and play. For adults, unicorns evoke nostalgia for simpler times and a connection to their youthful imagination. Unicorn cakes blend these elements—colorful, whimsical, and magical—which makes them equally captivating to both children and adults.
- Vibrant Colors and Playful Designs: One of the key features of unicorn cakes is their bright, cheerful colors. With swirls of pastel pinks, blues, purples, and yellows, these cakes immediately grab attention and evoke a sense of joy. Kids are attracted to the vibrant hues for fun, while adults admire the creativity behind such colorful confections. The visual appeal of a unicorn cake is a significant factor in its cross-generational popularity.
- Customization and Creativity: Unicorn cakes offer endless opportunities for customization and creativity, which makes them appealing for various occasions. You can tailor these cakes for children’s themed parties like unicorns or fairy tales, while adults enjoy the creative challenge of designing playful or sophisticated cakes. The customization and whimsical theme offer creative expression for both kids and adults.
- Symbol of Joy and Celebration: Unicorn cakes enhance the celebration vibe with their joyful, magical design. Whether for a birthday, special event, or treat, they evoke happiness and excitement. For children, they feel like a magical indulgence, while for adults, they symbolize lightheartedness and a carefree spirit. Perfect for any age, unicorn cakes are a fun choice for birthdays, baby showers, or adult celebrations.
- Nostalgia and Culture: Unicorns have made a resurgence in pop culture, particularly in the past decade, with unicorn-themed merchandise, fashion, and even viral internet content. Adults, who grew up with unicorns in their childhood stories, often feel drawn to these nostalgic themes. The mix of nostalgia and the magical allure of unicorns creates an emotional connection for adults. For kids, unicorns remain popular in cartoons and books, making the cake appealing to them. This cross-generational connection to unicorns makes the cakes a perfect choice for all ages.
- Fun, Yet Elegant Presentation: Unicorn cakes can range from playful and fun designs (with plenty of edible glitter, rainbow layers, or fondant horns) to more refined, elegant versions (with soft pastel shades and delicate decorations). This versatility allows you to adapt unicorn cakes for a variety of settings. Colorful cakes delight children, while adults may prefer subtle, sophisticated versions that retain the unicorn’s magic. This versatility appeals to all ages.
- Indulgence and Fantasy: Unicorn cakes offer more than design—they bring a sense of magic and escapism. As a treat that elevates any occasion, their whimsical charm delights both kids and adults.
In summary, unicorn cakes are perfect for all ages because they blend imagination, nostalgia, and celebration. With vibrant colors, magical designs, and customizable options, unicorn cakes bring joy, wonder, and whimsy to all ages, capturing hearts with their timeless charm and nostalgic appeal.
Vibrant and Customizable Designs of unicorn cake
Modern design offers endless personalization, allowing you to tailor colors, patterns, textures, and materials to fit any project, theme, or mood with creativity.
1. A Spectrum of Colors
Colors play a critical role in design, evoking emotions and setting the tone for the viewer’s experience. With advancements in digital design tools and printing technology, there’s no limit to the color palette you can choose from. You can choose colors, from bold, vibrant hues to calming pastels and earth tones, to enhance your design’s appeal.
Additionally, custom color schemes allow for perfect alignment with branding guidelines, cultural associations, or even personal taste. Refining colors lets you craft a unique design that resonates with your audience or reflects your style.
2. Style Customization
Design styles today are incredibly diverse, ranging from minimalistic and modern to vintage-inspired or eclectic. Customization lets you mix styles, draw on artistic influences, and create designs that feel fresh and tailored. From sleek lines to intricate details, you can reflect your personality or brand.
Additionally, style customization enables you to experiment with different visual elements such as typography, layouts, and graphical elements. You can fine-tune everything, ensuring the design communicates exactly what you want in a way that feels uniquely your own.
3. Interactive Customization Tools
Digital platforms now offer interactive tools to modify colors, adjust styles, and preview designs in real time. This hands-on approach makes it easy to explore an endless variety of combinations, instantly seeing the impact of each change. Customizing websites, product designs, or home décor lets you go beyond pre-set templates by tweaking every element.
4. Accessibility and Practicality
Customizable designs support accessibility with options like colorblind-friendly palettes, high-contrast themes, and user-friendly layouts, ensuring designs are both appealing and functional.
5. Trends and Personal Preferences
Vibrant, customizable designs let you stay on trend while maintaining a personal, unique touch, blending the latest aesthetics with your vision.
In conclusion, vibrant and customizable designs offer the freedom to experiment, innovate, and create something that is truly one-of-a-kind. Whether a large project or personal endeavor, combining colors, styles, and elements offers endless possibilities to create a design that stands out and reflects your identity.
Ideal for Special Occasions: Highlight their role as show-stopping party centerpieces
To create a memorable celebration, standout elements like party centerpieces draw attention and set the tone. Whether for a birthday, wedding, or milestone event, well-designed centerpieces enhance the theme and atmosphere.
1. Aesthetic Impact and Visual Appeal
Centerpieces are often the first thing guests notice, setting the mood for the event. Whether bold or understated, they anchor the room and enhance the ambiance with colors, textures, and materials that complement the theme. From floral arrangements to candle displays or sculptures, these pieces spark conversation and excitement.
2. Thematic Consistency
One of the most powerful aspects of party centerpieces is their ability to tie together the theme of the event. Whether for a rustic gathering, black-tie dinner, or themed party, centerpieces offer a platform for creativity and thematic expression.
Customizing the centerpiece to reflect the event’s motif helps maintain consistency throughout the decor, ensuring that every element feels intentional. Incorporating colors, symbols, or references creates a cohesive narrative from the center of the table outward.
A beach-themed wedding might use seashells and driftwood, while a winter wonderland party could feature pinecones, snowflakes, and twinkling lights. These thematic elements, anchored by the centerpiece, help create an immersive experience for guests.
3. A Conversation Starter and Photo Opportunity
Centerpieces don’t just add to the atmosphere — they also serve as natural conversation starters. Guests admire the creativity of a well-designed centerpiece, often complimenting its details. It also becomes a focal point for photos, creating lasting memories of the event.
The centerpiece could include interactive features like a floral wall or light-up display, encouraging engagement and creating lasting memories. Photographs of these moments keep the centerpiece alive long after the event.
4. Customization for Personal Touches
Custom centerpieces add a personal touch to special occasions and reflect the personalities of those being celebrated. Whether it’s a couple’s favorite colors or a milestone birthday’s themes, these meaningful touches create a deeper connection and make the event feel more special.
5. Creating Atmosphere and Setting the Tone
You can use the centerpiece’s size and design to guide the overall atmosphere of the occasion. Larger, more dramatic centerpieces can create a bold, celebratory feel, perfect for grand occasions like anniversaries or corporate events. Smaller, intimate pieces add elegance to gatherings like dinner parties, while lighting—candles, string lights, or LEDs—sets the mood, from cozy to vibrant.
6. Versatility Across Occasions
The beauty of a standout centerpiece is its versatility across various special occasions. A centerpiece designed for one type of event can be modified to fit a different occasion. A floral arrangement can be tailored for weddings, birthdays, or holidays by adjusting colors, flowers, and decorations, making it a versatile centerpiece for any event.
7. Crafting Unforgettable Experiences
Ultimately, the role of the centerpiece extends beyond its visual appeal. A great centerpiece is about creating a memorable experience for guests. It sets the tone for the celebration and becomes a symbol of the event. Whether it sparks joy, wonder, or nostalgia, the centerpiece creates a lasting impression and helps ensure that the occasion remains fondly remembered for years to come.
In conclusion, striking centerpieces shape the atmosphere, enhance the theme, and spark conversation. With creativity, a unique centerpiece becomes a memorable part of your guests’ experience.
Essential Tools and Ingredients for Unicorn Cakes
Baking Tools Checklist: Cake Pans, Spatulas, Piping Bags, and Turntables
When it comes to baking, having the right tools can make all the difference between a successful cake and a frustrating experience. Here’s a detailed checklist of essential tools that every baker should have in their arsenal:
1. Cake Pans
- Round Cake Pans: These are the most common for layer cakes. They range in size from 6-inch to 10-inch and suit different types of cakes, such as sponge, butter, or even cheesecakes. Choose pans made of durable materials like aluminum or stainless steel to ensure even heat distribution.
- Square or Rectangular Pans: Perfect for sheet cakes, brownies, or bars. Bakers often use these pans for cakes that need to be cut into pieces and served in individual portions.
- Springform Pans: Ideal for cheesecakes or delicate cakes. The removable sides make it easier to release the cake without disturbing its shape.
- Bundt Pans: These pans are great for making ring-shaped cakes, which often have a unique texture and presentation. Bundt pans come in various designs, adding an elegant touch to any cake.
2. Spatulas
- Offset Spatulas: These are essential for frosting cakes evenly. Their angled design allows for better control, making it easier to smooth out the frosting and reach edges.
- Straight Spatulas: Used for scraping the sides of the bowl or working with batter and icing. They are also useful for applying smooth, even layers of frosting.
- Silicone Spatulas: Highly versatile and heat-resistant, silicone spatulas are perfect for scraping out the last bits of cake batter or frosting from bowls, mixing and folding, or spreading icing evenly on cakes.
3. Piping Bags
- Reusable Piping Bags: These eco-friendly bags are a must for decorating cakes. They come in various sizes, and their durability makes them perfect for precise piping of frosting, royal icing, or even fillings. Pair with a set of tips for different effects.
- Disposable Piping Bags: Ideal for one-time use or for different colors or types of frosting. These are convenient, especially when working with multiple colors or types of icing, as they minimize the cleaning process.
- Piping Tips: There’s a wide variety of tips, from round tips for writing or dotting to star-shaped tips for creating ruffles and borders. Some sets include specialized tips for intricate flower designs, leaves, or even basketweaves.
4. Turntables
- Cake Turntables: A rotating base that makes decorating cakes much easier. These turntables allow you to turn the cake smoothly while you frost or pipe details, ensuring an even application and beautiful results. Look for a turntable with a non-slip surface to keep your cake in place.
- Heavy-Duty Turntables: Some turntables designers create for heavy cakes, offering a sturdier rotation. These are particularly useful for tiered cakes or cakes that require more support during decoration.
- Adjustable Height Turntables: These turntables allow for added versatility by adjusting the height, making it easier to work at different angles or with larger cakes.
se tools will equip you to tackle a wide range of cake-baking and decorating tasks. Quality tools can help streamline the baking process, improve the outcome of your cakes, and make cake decoration more enjoyable and less stressful. Happy baking!
Decorative Essentials: Fondant, Edible Glitter, Rainbow Sprinkles, and Unicorn Toppers
Decorating a cake isn’t just about taste; it’s about creating a visual experience that wows your guests. Whether you’re crafting a whimsical birthday cake or an elegant wedding tier, these decorative essentials can help elevate your designs to the next level. Here’s a breakdown of some of the must-have cake decorating essentials:
1. Fondant
- What is Fondant?: Fondant is a smooth, pliable icing made from sugar, water, and gelatin. Bakers often use it to cover cakes and create decorative elements due to its smooth texture and versatility. You can roll it out to create a sleek, polished finish or mold it into various shapes and designs.
- Uses of Fondant:
- Cake Covering: Bakers often use fondant to cover entire cakes, creating a flawless, smooth surface. It provides a professional look, helping to hide imperfections in the cake beneath it.
- Decorative Pieces: You can use fondant to create flowers, figurines, ribbons, and other intricate decorations. With the right tools, you can mold it into almost anything, from lifelike flowers to playful animals.
- Layering: Bakers sometimes use fondant in layers to create texture on the cake, such as ruffles, pleats, or bows.
- Flavor Options: Fondant offers a smooth look but can be too sweet for some. You can choose flavored fondants (like vanilla, chocolate, or fruit) or combine it with buttercream for a balanced taste.
2. Edible Glitter
- What is Edible Glitter?: Edible glitter is a fine, shimmering powder made from food-grade ingredients such as sugar, cornstarch, and mica. Unlike non-edible glitter, which can be toxic, edible glitter is specifically designed for use in food.
- Uses of Edible Glitter:
- Adding Sparkle: A sprinkle of edible glitter can give your cake a magical, sparkling effect. It’s perfect for creating a festive vibe for birthdays, weddings, or New Year’s celebrations.
- Cake Details: Edible glitter can be used on fondant or buttercream to highlight certain features, like a flower center or the edges of a tier.
- Colored Glitter: Available in a range of colors (gold, silver, pink, blue, etc.), edible glitter can match the theme of your cake and add a touch of glam or a subtle shimmer.
- Applications: Edible glitter can be dusted over a cake or applied to specific areas with a brush or sifter. Some stay on the surface, while others blend into the decoration.
3. Rainbow Sprinkles
- What Are Rainbow Sprinkles?: Rainbow sprinkles are colorful, tiny sugar-coated pieces often used for adding texture and fun color to cakes and desserts. They’re typically available in various shapes (round, jimmies, nonpareils, etc.) and sizes.
- Uses of Rainbow Sprinkles:
- Cake Topping: Rainbow sprinkles add a fun, playful touch to cakes, making them ideal for children’s birthdays and festive occasions.
- Borders and Edging: Sprinkles can be used to create decorative borders along the edges of a cake or around the base of the cake tiers.
- Mixing with Other Decorations: They can be mixed with other edible decorations like chocolate chips, nuts, or edible pearls to add texture and visual interest.
- Other Variations: include metallic sprinkles, sugar crystals, and themed sprinkles like hearts, stars, or seasonal shapes.
4. Unicorn Toppers
- What Are Unicorn Toppers?: Unicorn toppers are cake decorations, often molded figurines, 3D models, or edible sugar shapes. They’re often used to add a magical or whimsical theme to cakes, especially for birthdays or themed parties.
- Types of Unicorn Toppers:
- Edible Unicorn Figures: Made from fondant or sugar paste, these edible figurines are perfect for adorning the top of cakes. They often feature a unicorn’s head, complete with a horn, mane, and ears, and can be hand-painted for intricate details.
- Non-Edible Unicorn Toppers: Plastic or ceramic unicorn toppers can also be used. These are typically removed before serving the cake but provide an eye-catching, lasting decoration.
- Unicorn Cake Rings: These are often small, plastic rings shaped like unicorns that can be placed on top of cupcakes or cakes for a fun, festive touch.
- Uses of Unicorn Toppers:
- Birthday Cakes: Unicorn toppers are a popular choice for kids’ birthday cakes, especially for those who love magical or fantasy-themed celebrations.
- Themed Cakes: Whether you’re creating a unicorn-themed party cake or a cake for someone who adores mythical creatures, these toppers can become the focal point of the design.
- Complementing with Other Decorations: Pair your unicorn topper with rainbow-colored frosting, edible glitter, or fondant flowers to enhance the overall magical look.
These essentials—fondant, edible glitter, rainbow sprinkles, and unicorn toppers—empower bakers to create unique, memorable cakes, whether whimsical or polished.
Frosting and Coloring Options: Whipped Cream, Pastel-Colored Icing, and Food Coloring
The frosting and color of a cake are just as important as its flavor, as they set the tone for the cake’s visual appeal and overall experience. Choosing the right type of frosting and coloring can make a huge difference in how your cake looks and tastes. Here’s a closer look at some popular frosting and coloring options:
1. Whipped Cream
- What is Whipped Cream?: Whipped cream is a light, airy frosting made by whipping heavy cream with sugar and vanilla. It’s soft, fluffy, and has a smooth texture that makes it a popular choice for a variety of cakes and desserts.
- Uses of Whipped Cream:
- Layering: Whipped cream can be used as a filling between cake layers, adding lightness and a creamy texture that complements denser cakes like sponge or angel food.
- Topping: It’s also commonly used as a topping for cakes, pies, and cupcakes. Whipped cream can be piped or spread easily over the cake’s surface for a soft, cloud-like finish.
- Decorative Applications: When whipped to the right consistency, whipped cream can be piped into intricate designs like rosettes, stars, or borders, perfect for adding a delicate touch to your cake’s decoration.
- Flavor Variations: You can customize whipped cream by adding different flavorings such as vanilla, almond, or citrus zest to enhance its taste. Additionally, for those who prefer a more stable whipped cream, a stabilizer (like gelatin or cornstarch) can be added to prevent it from losing its volume too quickly.
- Ideal Cakes for Whipped Cream: Whipped cream works particularly well with lighter cakes like angel food, chiffon, or sponge cakes. It can also be paired with fruit-filled cakes or as part of a layered dessert to bring a fresh, creamy contrast.
2. Pastel-Colored Icing
- What is Pastel-Colored Icing?: Pastel-colored icing refers to icings (typically buttercream, royal icing, or cream cheese frosting) that have been tinted with gentle, soft colors. These delicate hues, such as pale pink, lavender, mint green, or baby blue, create an elegant and whimsical look, making them popular for baby showers, weddings, or springtime celebrations.
- Types of Icing Used for Pastel Colors:
- Buttercream: The most common frosting for pastel colors is buttercream. Buttercream has a smooth, creamy consistency that works well with coloring and is easy to pipe or spread. You can achieve a rich pastel shade by adding just a small amount of food coloring.
- Royal Icing: Royal icing, made from egg whites (or meringue powder), powdered sugar, and water, dries to a firm, glossy finish. It can be tinted with food coloring and is often used for detailed decoration like flowers, lace designs, or intricate piping.
- Cream Cheese Frosting: This frosting is a tangy and creamy option made with cream cheese, butter, and powdered sugar. It pairs well with cakes like carrot, red velvet, or spice cakes. You can create soft pastel hues with this icing by carefully blending in color.
- Uses of Pastel-Colored Icing:
- Subtle Elegance: Pastel-colored icing is perfect for creating an elegant, soft look on wedding cakes or baby shower cakes. It’s often used in layered ombré effects, delicate piping work, or as a base for more intricate designs.
- Themed Cakes: Pastel shades are perfect for themed cakes, such as floral designs, soft rainbow effects, or nature-inspired themes like clouds, skies, or butterflies.
- Color Coordination: Pastels work well when you want to coordinate your cake’s colors with the party theme or decor. You can mix and match pastel shades to create beautiful gradients or to decorate with subtle accents and designs.
3. Food Coloring
- What is Food Coloring?: Food coloring is a concentrated colorant used to tint icings, frostings, batters, and other edible items. Food coloring comes in several forms, including liquid, gel, powder, and paste. Gel or paste food coloring is often preferred for frosting because it is more concentrated and doesn’t alter the consistency as much as liquid coloring.
- Types of Food Coloring:
- Liquid Food Coloring: This is a commonly available option in supermarkets and is easy to use. However, it can dilute the texture of your frosting or batter if too much is added. It’s perfect for lighter shades but may require a larger quantity to achieve deep colors.
- Gel or Paste Food Coloring: These are concentrated colorants that give richer, deeper colors with only a small amount needed. Gel colors are great for buttercream, royal icing, or fondant as they provide vibrant results without altering the consistency.
- Powdered Food Coloring: Powders are ideal for fondant or other dry ingredients because they can be mixed without introducing moisture. They can be used to tint sugar, fondant, or airbrushed designs.
- Natural Food Coloring: These are derived from fruits, vegetables, and spices and are a more organic way to tint your cake decorations. For example, beet juice for red, spinach powder for green, or turmeric for yellow.
- Uses of Food Coloring:
- Rainbow Cakes: A classic use of food coloring is creating vibrant layers for rainbow cakes. You can use different colors for each layer to create a colorful surprise when the cake is cut.
- Piping and Detailing: Food coloring is often used to create intricate designs like floral patterns, characters, or borders. When mixed into royal icing or buttercream, it can be piped into different shapes, offering infinite creative possibilities.
- Ombre Effects: Gradual color transitions, like ombré, are made easy with food coloring. By adjusting the amount of color added to different batches of frosting, you can create a stunning fade effect on the cake’s surface.
- Tips for Using Food Coloring:
- Start Small: It’s easier to add more color than to fix an overly bright batch. Start with a tiny amount of food coloring and gradually add more until you reach the desired shade.
- Mix Thoroughly: Be sure to mix the coloring evenly through your frosting or icing to avoid streaks. For buttercream, use a spatula to ensure it’s well-integrated.
- Safety and Quality: Choose food-safe, non-toxic colors to ensure your cakes remain safe to eat. Some food colorings (especially synthetic ones) can stain clothing or hands, so it’s wise to wear gloves when working with them.
Mastering frosting and coloring options—whipped cream, pastel icing, and food coloring—lets you create delicious, visually captivating cakes. Each option adds a unique touch, from light whipped cream to soft pastels or bold food coloring.
Optional Add-ons: Using Edible Markers, Chocolate Molds, or Pre-made Decorations
When decorating cookies, cupcakes, or cakes, additional tools and decorative elements can elevate your creations, making them not only more visually appealing but also enhancing their flavor and texture. Some of the popular optional add-ons include edible markers, chocolate molds, and pre-made decorations. Here’s how you can use these items to take your baking and decorating skills to the next level:
1. Edible Markers
Edible markers are an excellent tool for adding fine details to your baked goods. These markers are specially designed with food-safe ink, making them safe to use on items like cookies, cakes, and cupcakes. Here’s how you can use them effectively:
- Draw Fine Details: Edible markers are perfect for drawing intricate designs like faces, flowers, patterns, or lettering on cookies or fondant-covered cakes.
- Customization: They allow you to add personal touches to treats, such as writing names, messages, or holiday greetings, without needing complex piping techniques.
- Easy to Use: They are user-friendly, even for beginners, and offer precise control, allowing you to draw or write on your baked goods without the mess.
- Variety of Colors: Edible markers come in a wide range of colors, so you can create multi-colored designs or even layer different shades for a more sophisticated look.
2. Chocolate Molds
Chocolate molds are an exciting way to add personalized and edible decorative elements to your baked goods. You can create a variety of chocolate shapes that complement the theme of your treats:
- Custom Shapes: Using silicone or plastic chocolate molds, you can create chocolate pieces in any shape—hearts, flowers, letters, or even intricate designs. These can be placed on top of cakes, cupcakes, or cookies for an extra touch.
- Flavor Variety: You can use different types of chocolate, such as dark, milk, or white chocolate, to suit the flavor profile of your baked goods. You can also flavor your chocolates with additional ingredients like peppermint, orange zest, or chili for unique twists.
- Creative Toppings: Chocolate molds can be filled with various ingredients, including nuts, fruit, or edible glitter, which will add texture and visual appeal to your decorations.
- Ease of Use: Melt the chocolate, pour it into the molds, and let it set. Once firm, you can easily pop the chocolate shapes out and place them on your treats.
3. Pre-made Decorations
Pre-made decorations offer a time-saving solution for anyone looking to decorate their treats with minimal effort but maximum impact. These are especially useful when you’re short on time or not confident in your decorating skills. Some examples include:
- Edible Glitter and Sprinkles: Edible glitter and sprinkles come in an assortment of shapes and colors, making it easy to add shimmer and color to cakes, cupcakes, or cookies. Whether you’re making birthday treats, holiday-themed bakes, or simply want to add some sparkle, they are perfect for any occasion.
- Fondant Decorations: Pre-made fondant decorations such as flowers, stars, and bows can be placed directly onto cakes and cupcakes for a professional finish. Fondant can also be molded into intricate shapes using tools, or you can buy pre-made figures like animals, flowers, or seasonal themes.
- Sugar Pearls and Dragees: These decorative sugar pearls or candy-coated dragees can be scattered on top of cupcakes or cakes to add texture and visual interest. They come in various sizes and colors, perfect for creating a shiny, elegant effect.
- Pre-made Sugar Flowers: If you’re looking for sophisticated flower decorations, pre-made sugar flowers can instantly enhance the look of your treats. They come in various varieties such as roses, lilies, and daisies, all carefully crafted from edible sugarpaste.
These pre-made elements simplify decoration while ensuring a polished look, ideal for events like weddings, birthdays, or holidays.
These add-ons let you customize baked goods, turning simple treats into eye-catching masterpieces. Whether you’re a seasoned baker or a beginner, these tools and ingredients will make decorating easy, fun, and customizable
10 Simple Unicorn Cake Ideas for Beginners
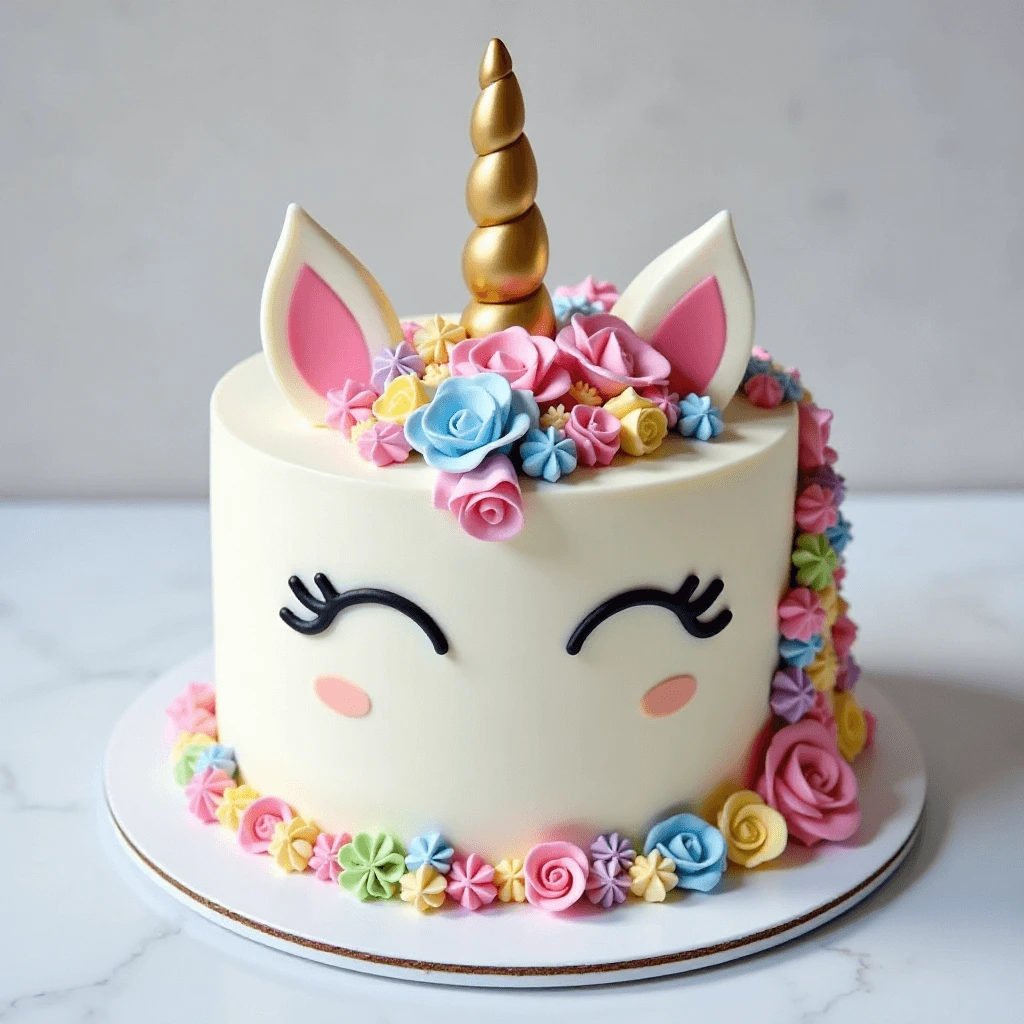
Classic Unicorn Horn Cake: Guide to Creating the Iconic Horn and Ears
The unicorn cake is a whimsical and enchanting treat that has captured the hearts of bakers and cake lovers everywhere. The iconic unicorn horn and ears are key features that bring the creature to life, making them the standout decorations for any birthday, themed event, or fun occasion.
Here’s a step-by-step guide to help you create the perfect unicorn horn and ears.
1. Creating the Unicorn Horn
The unicorn horn is typically a spiral shape, which gives it its magical and otherworldly look. It can be made from various materials, but fondant and modeling chocolate are the most common and effective choices. Here’s how to create the perfect horn:
- Materials You’ll Need:
- Fondant or modeling chocolate (white or colored)
- A rolling pin
- Cornstarch or powdered sugar (for dusting)
- A skewer or dowel (for support)
- Edible gold or silver paint (optional)
- Step-by-Step Instructions:
- Roll the Fondant or Modeling Chocolate: Begin by rolling out your fondant or modeling chocolate into a long, thin strip. It should be about 1 to 2 inches wide and long enough to form a cone shape.
- Form the Cone Shape: Gently twist the strip of fondant into a spiral, keeping it tight as you go. The tighter the twist, the sharper the spiral will be. Roll the strip into a cone shape, ensuring that the base is wide enough to secure the horn to the cake later.
- Insert the Skewer or Dowel: Before sealing the horn completely, insert a skewer or dowel into the center. This will act as the support for the horn, ensuring that it stands upright on your cake without toppling over.
- Smooth and Shape: Once you have the spiral cone shape, smooth out any creases or seams by gently rubbing the fondant with your fingers or a fondant smoother. Shape the tip of the horn to a fine point.
- Paint the Horn (Optional): For a more magical and ethereal look, you can paint the horn with edible gold or silver paint. This will give it a shimmering, metallic finish. If you prefer a more subtle look, you can leave the horn plain or dust it lightly with edible glitter for a sparkling effect.
- Allow to Set: Let the horn dry for several hours or overnight so that it maintains its shape and hardens slightly. Once it’s dry, it will be ready to be placed on your cake.
2. Making the Unicorn Ears
The ears of the unicorn are another critical feature that helps complete the overall look of the cake. Unicorn ears are typically made from fondant, which can be shaped and colored to match the rest of your design. You can create these ears easily using fondant and a few simple tools.
- Materials You’ll Need:
- White fondant (for the ear base)
- Pink fondant (for the inner ear)
- Cornstarch or powdered sugar (for dusting)
- A small rolling pin or a fondant roller
- A sharp knife or fondant tool for cutting
- Step-by-Step Instructions:
- Roll Out the White Fondant: Begin by rolling out the white fondant into a smooth sheet. The thickness should be about ¼ inch thick.
- Cut the Ear Shape: Using a sharp knife or a fondant cutter, cut two ovals or teardrop shapes from the white fondant. These will be the outer part of the unicorn’s ears.
- Shape the Ears: Gently fold or curl the top of each oval to create a slight curve, mimicking the shape of a real unicorn’s ears. You can use your fingers or a fondant tool to smooth and shape the edges.
- Make the Inner Ear: Roll out the pink fondant and cut out smaller ovals or teardrop shapes to place inside the white ear shapes. The pink pieces should be slightly smaller than the white ones, leaving a border around the edges for contrast.
- Attach the Inner Ear: Use a small amount of edible glue or a mixture of water and cornstarch to attach the pink inner ear pieces to the white outer ear pieces. Press gently to ensure they adhere.
- Shape the Base: To give the ears a more 3D look, gently shape the bottom of the ears so that they curve slightly, like a natural ear. You can even bend the tips to make them appear more lifelike.
- Dry the Ears: Let the ears dry for a few hours to harden before placing them on the cake. This will ensure they hold their shape and don’t droop.
3. Assembling the Unicorn Horn and Ears
Once the horn and ears are ready, it’s time to assemble them onto the cake:
- Position the Horn: First, place the unicorn horn at the top center of your cake. Gently press it into the top of the cake, ensuring that the skewer or dowel goes deep enough to secure it. If needed, use a small amount of buttercream or frosting to help hold it in place.
- Attach the Ears: Position the ears on either side of the horn. Place them slightly below the base of the horn, ensuring they’re evenly spaced. Use edible glue or frosting to attach them securely. You can tilt the ears slightly for a more natural look.
- Add Final Touches: Once the horn and ears are in place, you can add additional decorations such as a colorful mane made from buttercream, piped frosting, or fondant flowers. To enhance the magical effect, consider adding edible glitter or sprinkles to the mane and around the horn.
These simple steps create a magical unicorn horn and ears that can be customized in various colors and styles to match your event theme, whether soft pastels or bold, vibrant hues.
Rainbow Layer Unicorn Cake: Easy Steps for Vibrant, Colorful Layers
A Rainbow Layer Unicorn Cake is a stunning and whimsical creation that captures the playful essence of a unicorn while showcasing a burst of vibrant colors. The multi-layered design not only looks visually appealing but also adds a fun twist to the traditional cake. Achieving vibrant, colorful layers requires a bit of planning and creativity, but the end result is sure to impress. Here’s a step-by-step guide to help you create the perfect rainbow layers for your unicorn cake.
1. Preparing the Cake Layers
The first step to creating a rainbow layer unicorn cake is baking the individual layers. To achieve the bright, vibrant colors, you will need to bake multiple layers of cake, each colored differently.
- Materials You’ll Need:
- Cake batter (either homemade or from a box)
- Food coloring (gel or liquid)
- Cake pans (6-inch or 8-inch rounds work well)
- Parchment paper (for lining pans)
- Butter or oil (for greasing pans)
- Step-by-Step Instructions:
- Prepare the Cake Batter: Begin by preparing your cake batter according to the recipe or box instructions. You can use any flavor of cake you prefer, but vanilla cake is a popular choice since it provides a neutral base that allows the food coloring to pop.
- Divide the Batter: Once your batter is ready, divide it evenly into several bowls (typically six for a rainbow cake). The number of bowls will correspond to the number of colors you plan to use. You can add more or fewer layers depending on how many colors you’d like to incorporate into the design.
- Add Food Coloring: In each bowl, add a few drops of food coloring and mix thoroughly. Gel food coloring is highly recommended because it provides a more vibrant, concentrated color without thinning out the batter. If you’re aiming for a soft pastel effect, you can use a smaller amount of food coloring.
- Prepare the Cake Pans: Grease and line your cake pans with parchment paper to ensure the cakes come out easily after baking. For a more uniform result, you can use 6-inch or 8-inch round cake pans. If you don’t have enough pans to bake all the layers at once, you can bake the layers in batches.
- Pour and Bake: Start by pouring the batter into the cake pans, one color at a time. Fill each pan about halfway full to give the cakes room to rise. Bake each layer according to the recipe instructions, typically around 20-25 minutes at 350°F (175°C), or until a toothpick inserted into the center comes out clean. If you’re using multiple pans, be sure to rotate them halfway through baking for even cooking.
- Cool the Layers: Once the cakes are baked, allow them to cool completely in the pans before removing them. This prevents them from breaking or crumbling when you take them out. Let the layers cool on wire racks for the best results.
2. Preparing the Buttercream Frosting
The frosting for your rainbow layer unicorn cake is just as important as the colorful cake layers. It not only binds the layers together but also serves as the base for any decorations, like the unicorn horn, ears, and mane.
- Materials You’ll Need:
- Butter (unsalted, at room temperature)
- Powdered sugar
- Heavy cream or milk
- Vanilla extract
- Gel food coloring (to match the cake layers)
- Piping bags and tips (for decorating)
- Step-by-Step Instructions:
- Make the Buttercream: To make your buttercream, beat the softened butter in a stand mixer or with a hand mixer until smooth. Gradually add powdered sugar, mixing well between additions. Add a splash of vanilla extract and a tablespoon of heavy cream or milk to reach the desired consistency. The frosting should be thick and spreadable, but not too stiff.
- Divide the Buttercream: Just like with the cake batter, divide your buttercream into multiple bowls to match the number of colors you have. You’ll need a separate bowl for each color to frost between the layers and decorate the cake.
- Color the Frosting: Using the same gel food coloring as for the cake layers, color each portion of buttercream to match the layers. You can also create pastel shades or more vibrant hues, depending on your style.
3. Assembling the Rainbow Layer Unicorn Cake
Now that you’ve baked your rainbow layers and prepared the buttercream, it’s time to assemble the cake. The goal is to stack the colorful layers in a way that showcases the beautiful gradient when sliced.
- Step-by-Step Instructions:
- Level the Cake Layers: If the cake layers have domed during baking, you can use a serrated knife or a cake leveler to trim them flat. This ensures that your layers are even and makes stacking them easier.
- Frost Between the Layers: Place the first layer of cake on a cake board or serving plate. Spread a thin layer of buttercream frosting on top of the cake layer, then add the next cake layer on top. Repeat this process for all the layers, making sure each layer is level and well-covered with frosting.
- Crumb Coat: Once all the layers are stacked, apply a thin layer of frosting all over the cake. This is called a “crumb coat,” and it helps seal in any crumbs, making the final frosting layer smoother. Chill the cake in the refrigerator for 20-30 minutes to set the crumb coat.
- Final Frosting Layer: Once the crumb coat sets, apply a thicker layer of frosting, smoothing it with a spatula or bench scraper to keep the edges neat and reveal the rainbow layers inside when cut.
4. Decorating the Unicorn Cake
The final step is to add the iconic unicorn elements to your rainbow cake. This includes the unicorn horn, ears, and mane.
- Unicorn Mane and Tail: Using colorful buttercream, pipe a fluffy mane and tail around the top of the cake using a star tip or any piping tip of your choice. For a more realistic look, you can add some edible glitter, sprinkles, or even fondant flowers around the mane.
- Unicorn Horn and Ears: Follow the steps for creating the unicorn horn and ears (as outlined in a previous section). Position the horn at the center of the cake and place the ears on either side, slightly below the horn. You can also add some additional decorations like stars, hearts, or edible flowers to enhance the look.
5. Serve and Enjoy
Once your rainbow layer unicorn cake is fully decorated, it’s ready to be served! When cut, the vibrant rainbow layers inside will create a stunning visual effect, making each slice feel like a magical experience. You can serve this cake at birthdays, baby showers, or any event that celebrates whimsy and fun.
By following these easy steps, you can create a visually striking Rainbow Layer Unicorn Cake that’s sure to wow your guests. The combination of colorful cake layers, creamy buttercream frosting, and playful unicorn decorations will bring joy to any occasion
Cupcake Unicorn Cake: Assemble Cupcakes into a Unicorn-Themed Masterpiece
Creating a unicorn-themed masterpiece doesn’t always require baking an elaborate multi-layer cake. With the versatility of cupcakes, you can easily assemble them into a whimsical unicorn design that’s both stunning and easy to serve. A Cupcake Unicorn Cake is a creative and fun way to showcase your baking and decorating skills, while offering individual servings for guests. Here’s a step-by-step guide to help you assemble cupcakes into a magical unicorn-themed creation.
1. Baking the Cupcakes
The first step is to bake the cupcakes that will form the base of your unicorn cake. While you can use any flavor of cake batter, a light and fluffy vanilla or pastel-colored cake works best to keep the look soft and whimsical.
- Materials You’ll Need:
- Cupcake batter (homemade or store-bought)
- Cupcake liners (optional but adds a nice touch)
- Muffin tin
- Piping bags and tips (for frosting)
- Food coloring (gel works best)
- Step-by-Step Instructions:
- Prepare the Batter: Start by preparing your cupcake batter according to the recipe or box instructions. You can add a bit of food coloring if you’d like to create pastel-colored cupcakes (light pink, blue, yellow, or lavender) to match the unicorn theme.
- Fill the Cupcake Liners: Line your muffin tin with cupcake liners. Fill each liner with the batter, making sure not to overfill—about 2/3 full works best to allow the cupcakes to rise evenly.
- Bake the Cupcakes: Bake the cupcakes at the temperature specified in your recipe or according to the instructions on the box. Typically, cupcakes bake for about 15-20 minutes at 350°F (175°C). Use the toothpick test to ensure they are done (insert a toothpick into the center of a cupcake; it should come out clean).
- Cool the Cupcakes: Once baked, allow the cupcakes to cool completely on a wire rack before decorating.
2. Preparing the Unicorn Decorations
The magic of a Cupcake Unicorn Cake lies in the decorations, especially the unicorn horn, ears, and mane. You can either create these elements from fondant or make them using buttercream and piping tips. Here’s how to prepare the key components:
- Unicorn Horn: The unicorn horn can be made using fondant, modeling chocolate, or even a sugar cone.
- Fondant Horn: Roll out yellow or gold fondant into a thin rope, then twist it to create the iconic spiral shape of a unicorn horn. You can make the horn as long or short as you like, depending on how prominent you want it to be. Insert a toothpick or small skewer inside to provide stability when you place it in the cupcake.
- Sugar Cone Horn: A simple alternative is to use a sugar cone (the type used for ice cream). You can coat the cone in edible gold or silver glitter to give it a shiny, magical look.
- Unicorn Ears: For the ears, you can use small pieces of fondant or buttercream.
- Fondant Ears: Roll out white fondant and cut out small teardrop shapes. For the inner ear, use pink fondant or buttercream and create a smaller shape that fits within the larger teardrop. Attach the inner ear to the outer ear piece using a little water or edible glue.
- Buttercream Ears: You can also use buttercream piped with a petal tip or a small round tip to form the ear shapes.
- Unicorn Mane: The mane can be made using brightly colored buttercream or fondant in pastel shades. For a fun effect, you can pipe the mane using a star tip or a petal tip to create a textured, voluminous look.
- Buttercream Mane: Divide your buttercream into multiple bowls and color each one in a different pastel hue (such as pink, blue, purple, and yellow). Pipe each color onto the top of the cupcake in sections, layering the colors to create a rainbow mane. For a flowing mane, pipe the buttercream in long, wavy swirls to resemble hair.
- Fondant Mane: If you prefer fondant, roll out colored fondant into thin strips and cut them into lengths. You can either layer the strips across the top of the cupcakes or twist them into curls for a more textured look.
3. Assembling the Cupcake Unicorn Cake
Now that you have all the elements ready, it’s time to assemble your cupcakes into a unicorn-themed masterpiece. This step involves arranging the cupcakes in a way that forms the face and features of the unicorn.
- Step-by-Step Instructions:
- Create the Unicorn Face Shape: Start by arranging the cupcakes in a large semicircular or oval shape on a cake board or serving platter. The number of cupcakes you’ll need will depend on the size of the unicorn cake you want to create. For a medium-sized unicorn, aim for 12-15 cupcakes. You can arrange the cupcakes in a curved shape to represent the face, with more cupcakes forming the rounded portion of the face and fewer cupcakes at the “nose” or front of the unicorn’s face.
- Position the Unicorn Horn: Place the unicorn horn at the center of the top cupcake or the center of the arrangement. Secure it gently into the cupcake using a toothpick or skewer. If you’re using a sugar cone, you can balance it on top of the cupcakes.
- Add the Unicorn Ears: Position the unicorn ears on either side of the horn. Place them slightly toward the outer edges of the face, ensuring they are visible but not obscured by the horn. If you’ve made fondant ears, you can gently press them into the frosting of the cupcakes, or you can use edible glue to secure them.
- Pipe the Unicorn Mane: Use your colored buttercream to pipe a mane around the top and sides of the unicorn face. Start with one color, then alternate between other colors to create a rainbow effect. You can create swirls, curls, or waves for a more dynamic look.
- Add Finishing Touches: Once the main features are in place, you can add smaller decorative elements such as edible glitter, star sprinkles, or fondant flowers. You can also pipe small accents like hearts, stars, or sparkles around the unicorn’s face to enhance the magical look.
4. Serving and Displaying the Cupcake Unicorn Cake
Once your cupcakes are assembled and decorated, it’s time to serve and display them! A Cupcake Unicorn Cake not only looks amazing but is also convenient to serve, as each guest can enjoy their own individual “slice” of unicorn magic.
- Display: To make the unicorn face stand out, arrange the cupcakes on a cake board or large platter. You can place a decorative border of flowers, stars, or additional sprinkles around the base to enhance the look.
- Serving: As cupcakes are individual portions, they make serving easy. Just pick one up, and each person gets a perfectly decorated treat with their own unicorn horn and mane.
Following these steps, you can create a magical Cupcake Unicorn Cake that combines fun presentation and convenience, perfect for parties and celebrations. Each cupcake becomes a delightful work of art, enchanting guests of all ages!
Drip-Style Unicorn Cake: Add a Whimsical Drip Effect with Colored Icing
1. Preparing the Base Cake
The Drip-Style Unicorn Cake is a show-stopping dessert that combines the magic of a unicorn with the trendiness of a drip cake. The colorful, cascading drips of icing add a playful and whimsical element, creating a visually striking and delicious dessert. The drip effect can be created with different colored icings, allowing you to tailor the cake to fit your unicorn theme and color palette. Here’s a detailed guide on how to create the perfect drip-style unicorn cake.
The first step in creating your Drip-Style Unicorn Cake is baking the base layers. You can use a classic flavor like vanilla, chocolate, or even funfetti for the base cake, as the colorful drips will be the focal point of the decoration.
- Materials You’ll Need:
- Cake batter (homemade or from a box)
- Cake pans (6-inch or 8-inch round pans work well)
- Buttercream or ganache for frosting
- Food coloring (gel or liquid)
- Piping bags
- Step-by-Step Instructions:
- Bake the Cake Layers: Prepare your cake batter according to your recipe or the instructions on the cake mix box. Divide the batter into cake pans and bake according to the recipe instructions (usually at 350°F/175°C for 25-30 minutes, depending on the size of the pans). Once baked, let the cakes cool completely before decorating.
- Level the Cakes: If your cake layers have domed during baking, level them using a serrated knife or a cake leveler. This ensures that your cake layers are even and stable when stacked.
2. Preparing the Buttercream or Ganache for the Drip Effect
The drip effect is typically created using either buttercream or chocolate ganache. Both options are delicious, but chocolate ganache offers a shinier, more elegant finish, while buttercream can be easily tinted to match your unicorn theme’s color palette.
- For Chocolate Ganache Drips:
- Ingredients: Heavy cream, chocolate (dark, milk, or white chocolate, depending on your preference).
- Instructions:
- Chop the chocolate into small pieces and place it in a heatproof bowl.
- Heat the heavy cream in a small saucepan over medium heat until it just begins to simmer.
- Pour the hot cream over the chopped chocolate and let it sit for a minute, allowing the chocolate to soften.
- Stir the mixture until smooth. Let it cool slightly (but not too much, as it will thicken and become harder to work with).
- If you want colored drips, add gel food coloring to the ganache once it has cooled slightly. Be cautious with the amount of food coloring, as it can alter the texture of the ganache.
- For Buttercream Drips:
- Ingredients: Butter, powdered sugar, heavy cream, vanilla extract.
- Instructions:
- Beat softened butter until creamy, then add powdered sugar, a tablespoon of heavy cream, and vanilla extract.
- Continue to beat the buttercream until smooth and spreadable. You may need to add more cream or powdered sugar to achieve the right consistency (thick but soft enough to drip).
- To make the buttercream drips, divide the frosting into separate bowls and color each with different gel food coloring to match the unicorn theme. You can go for pastel shades like pink, purple, blue, and yellow to create a soft and magical effect.
3. Frosting the Cake
Before adding the drips, your cake should be frosted with a smooth layer of frosting or ganache. This serves as a base for the colorful drips and helps the drips adhere to the cake.
- Step-by-Step Instructions:
- Apply a Crumb Coat: Apply a thin layer of frosting or ganache over the entire cake to seal in the crumbs. This is called the crumb coat. Once applied, chill the cake in the refrigerator for about 20-30 minutes to allow the crumb coat to set.
- Add the Final Coat of Frosting: Once the crumb coat is set, apply a thicker, more even layer of frosting over the entire cake. You can use an offset spatula or a bench scraper to smooth out the frosting, ensuring that the surface is as smooth as possible.
- Chill the Cake: After frosting, chill the cake again for 20-30 minutes. This ensures that the base layer of frosting is firm and will hold the drip effect without absorbing too much of the ganache or colored buttercream.
4. Adding the Drip Effect
Now comes the fun part—adding the colorful drip effect! This is where you can get creative and make your cake come alive with color.
- Step-by-Step Instructions:
- Prepare the Drip Icing: If using ganache, pour it into a piping bag or squeeze bottle for easy application. If using buttercream, fit a piping bag with a small round tip or a squeeze bottle and fill it with the colored buttercream.
- Test the Drip Consistency: Before applying the drip, test the consistency of your ganache or buttercream. The drip should be thick enough to hold its shape but thin enough to run down the sides of the cake. If it’s too thick, add a small amount of cream to thin it out. If it’s too runny, allow it to cool a bit more.
- Apply the Drips: Starting at the edge of the cake, gently squeeze or pipe the ganache or buttercream to create drips along the sides. Work your way around the cake, allowing the drips to fall naturally down the sides. You can make the drips uniform or let them vary in length for a more organic look. If you want a multicolored drip effect, apply different colored drips in different sections, or alternate between colors as you move around the cake.
- Fill the Top: Once the drips are in place, fill in the top of the cake with a smooth layer of icing or ganache. You can leave the top plain or decorate it further with additional toppings.
5. Decorating the Unicorn Cake
To elevate the whimsical charm of your Drip-Style Unicorn Cake, finish the look with some fun unicorn-themed decorations. These can include a unicorn horn, ears, and a colorful mane, or any other elements that reflect the magic and playfulness of a unicorn.
- Unicorn Horn and Ears: As described in earlier sections, create a unicorn horn and ears using fondant, modeling chocolate, or sugar cones. Attach the horn at the center top of the cake, and place the ears on either side. You can pipe additional buttercream or fondant accents, like flowers or stars, around the base of the horn.
- Unicorn Mane: Pipe a colorful mane around the base of the unicorn horn. Use different pastel-colored buttercream to create a layered, flowing effect. You can use a piping tip like a star tip or a petal tip to give the mane texture.
- Additional Decorations: Enhance the magic of the unicorn cake with edible glitter, colorful sprinkles, or even edible stars and pearls. These small details can add sparkle and dimension to the cake, making it feel more magical.
6. Final Touches
After adding the drips and decorations, let the cake set for a few minutes to firm up the drips. Refrigerate to keep everything in place, but allow the cake to reach room temperature before serving to soften the buttercream or ganache.
Serve and Enjoy Your Drip-Style Unicorn Cake
Your Drip-Style Unicorn Cake is now ready to serve! This cake blends the elegance of drip effects with a whimsical unicorn theme, making it perfect for birthdays or any event that needs a colorful, magical dessert. The bold drips create visual impact, while the unicorn decorations add a playful, enchanting touch.
Tips and Tricks for Perfect Unicorn Cake Designs
Creating a Multicolor Frosting Swirl: Techniques for Achieving the Perfect Pastel Blend
A multicolor frosting swirl is one of the most eye-catching techniques used in unicorn-themed cakes and cupcakes. This method allows you to blend several colors of buttercream into beautiful, soft, pastel swirls that mimic the magical, whimsical nature of a unicorn. The key to a perfect pastel blend lies in both the frosting consistency and the technique you use to swirl the colors together. Here’s a detailed guide to help you master the art of multicolor frosting swirls.
1. Preparing the Buttercream
The first step to achieving a pastel blend is to make a smooth, fluffy buttercream frosting. You can use either a classic American buttercream or a Swiss meringue buttercream, depending on your preference. American buttercream is sweeter and easier to make, while Swiss meringue buttercream is smoother and has a more refined texture.
- Ingredients for Buttercream:
- 1 cup unsalted butter (softened)
- 4 cups powdered sugar (sifted)
- 2-4 tablespoons heavy cream or milk (for consistency)
- 1 tablespoon vanilla extract (optional)
- Pinch of salt (to balance sweetness)
- Instructions:
- Beat the Butter: In a stand mixer or with a handheld mixer, beat the softened butter on medium speed for 3-4 minutes until light and creamy.
- Add Powdered Sugar: Gradually add powdered sugar, 1/2 cup at a time, and continue to beat on low speed. Once all the sugar is incorporated, increase the speed and beat until fluffy.
- Add Liquid: Add heavy cream (or milk) a tablespoon at a time until you reach your desired frosting consistency. The frosting should be thick but spreadable.
- Flavor and Color: Add vanilla extract and a pinch of salt. Divide the frosting into separate bowls for each color. You can use gel food coloring to achieve pastel hues—be careful not to overdo it, as too much food coloring can affect the texture of the frosting.
2. Coloring the Frosting
To create the pastel blend, you’ll need to choose your desired colors. For a unicorn theme, soft pastels like pink, lavender, blue, yellow, and mint are ideal. Gel food coloring is the best option for achieving vibrant, non-runny colors.
- Step-by-Step Instructions:
- Divide the Buttercream: Divide your buttercream into separate bowls based on the number of colors you want. Start with at least 3-4 colors to get a nice pastel variety (for example, pink, blue, purple, and yellow).
- Add Gel Food Coloring: Use gel food coloring to tint each bowl of buttercream. Start with a small amount of gel food coloring and mix thoroughly. Add more as needed until you achieve the desired pastel shade. Be careful not to add too much coloring, as this can cause the buttercream to become too runny.
- Adjust the Consistency: If necessary, add a tiny bit of heavy cream to thin out the frosting if it becomes too thick after adding the coloring. The frosting should be easy to pipe and spread but not too soft that it loses its shape.
3. Assembling the Piping Bags
Once your frosting is colored, the next step is to prepare the piping bags. Using multiple piping bags or one large bag with multiple colors is key to achieving a seamless swirl effect.
- Step-by-Step Instructions:
- Using Multiple Piping Bags: If you have several colors of frosting, you can fill each color into its own piping bag. For added convenience, you can also use large piping bags and fit smaller bags of each color inside. This allows you to have each color ready to pipe without needing to switch bags mid-decoration.
- Creating a Multi-Color Piping Bag (One Bag for All Colors): To combine all the colors into a single bag for easy piping, follow these steps:
- Start by placing a strip of each color frosting along the inside of the piping bag. Use a spatula to apply the frosting along the sides of the bag, placing the colors next to each other without mixing them.
- Layer the colors so that they are in a line along the piping bag’s inner surface. The more layers you add, the more defined the swirl will be.
- Once all colors are in the bag, gently squeeze the bag to push the frosting down and ensure that all colors are combined at the tip of the bag. Be careful not to squeeze too hard, as this can cause the colors to mix prematurely.
4. Piping the Frosting Swirl
Now that you have your piping bag filled with multicolored frosting, it’s time to start creating the swirl effect. The technique here is key to achieving that perfect, blended pastel look.
- Step-by-Step Instructions:
- Choose Your Piping Tip: The piping tip you use will determine the texture of the swirl. A large star tip (such as Wilton 1M or 2D) is ideal for creating a big, fluffy swirl. If you want smaller, tighter swirls, a round piping tip or a smaller star tip will work.
- Pipe the Swirls: Hold the piping bag at a 90-degree angle to your cake or cupcake and begin piping in a circular motion. Start from the outer edge of the area you want to decorate, working your way inward, and create a spiral motion as you pipe. You can vary the size of each swirl to create depth and visual interest.
- Blend the Colors: To create a smooth, blended effect, allow the colors to mix slightly as you pipe. If you want a sharper contrast between the colors, pipe in a way that each color remains distinct without blending into the others too much.
- Continue Around the Cake: Once you’ve completed one swirl, move on to the next, continuing around the entire cake or cupcake. For cupcakes, you can pipe swirls in the center, layering the colors one on top of the other. For cakes, start piping the swirls from the outside and continue inward to cover the top and sides.
5. Creating a Smooth and Balanced Blend
While the swirls themselves are striking, it’s important to make sure the color blend feels harmonious. Here are some tips for achieving the perfect pastel blend:
- Balance the Colors: Make sure that no one color overpowers the others. Each swirl should have a blend of multiple colors, with no color taking the spotlight. This creates the feeling of a harmonious, magical unicorn theme.
- Use a Spatula for Smoothing: If you want a smoother, less defined swirl, you can use an offset spatula to lightly drag through the swirls to blend the colors together slightly. This can help give the design a softer, more seamless look.
6. Additional Tips for Perfection
- Use a Turntable for Cakes: If you’re decorating a cake, using a turntable can help you create a smoother, more consistent swirl. Rotate the turntable as you pipe, allowing you to apply pressure evenly and achieve a uniform swirl pattern.
- Mixing Gel Colors: If you want to create even softer pastel shades or a more unique blend, you can mix a small amount of two gel colors to make new hues. For example, mixing pink and purple gel food coloring will give you a soft lavender shade that can be incorporated into your swirl.
- Work Quickly: Buttercream can begin to firm up as it sits, especially in warm conditions. Try to pipe your swirls fairly quickly after preparing the frosting to ensure it remains smooth and easy to work with.
- Add Sparkles or Edible Glitter: To take your swirl cake to the next level, you can add edible glitter or sprinkles to enhance the magical effect. This is especially effective if you’re aiming for a unicorn-themed cake or cupcakes.
Serving and Enjoying Your Multicolor Frosting Swirl Cake
Your multicolor frosting swirl cake is ready to shine at any party! Whether cupcakes or a full cake, the colorful swirls add a playful, unicorn-inspired touch. This customizable technique suits any color palette and is perfect for various occasions. Soft pastel swirls and buttery frosting create a cake that’s as delightful to the eyes as it is to the taste buds. Enjoy your beautifully swirled masterpiece!
Using Edible Glitter Wisely: How to Add Sparkle Without Overdoing It
Edible glitter is a magical touch that can elevate any cake, cupcake, or dessert with its shimmering effect. Use edible glitter sparingly to avoid overwhelming your design. When applied correctly, it adds a touch of sparkle to unicorn-themed cakes, cupcakes, or desserts, enhancing the whimsical aesthetic without overpowering it. Here’s how to achieve the ideal balance when using edible glitter.
1. Choosing the Right Edible Glitter
Before applying edible glitter, it’s important to choose the right type that fits the look you’re going for. There are a few different kinds of edible glitter on the market, and the right one will depend on your design and desired outcome.
- Types of Edible Glitter:
- Fine Glitter: This type of glitter has small, finely ground particles that give a more subtle shimmer. It’s perfect for adding a light dusting over the entire cake or for creating delicate accents.
- Chunky Glitter: Larger, more textured glitter creates a more pronounced effect. Chunky glitter is great for accentuating specific areas of your cake or cupcakes, such as the unicorn horn or floral decorations.
- Sprinkles with Glitter: Some edible sprinkles come mixed with glitter, offering a textured effect combined with a sparkly shine. These are ideal for topping cupcakes or cake edges for a more playful look.
- Holographic Glitter: Holographic glitter has a multi-dimensional, rainbow effect that catches the light in different ways. This type of glitter works well for unicorn-themed cakes, where a magical, colorful shine is desired.
- Tip: Always check that the glitter is labeled “edible” to ensure that it’s food-safe. There are also non-toxic glitters available, but those are usually for decorative purposes and not meant for consumption.
2. Deciding Where to Apply Glitter
While glitter can enhance the overall design of your dessert, too much glitter can quickly become overwhelming. The key is to know where to apply it and where to hold back. Applying glitter strategically will ensure it enhances your cake without overpowering other elements.
- Subtle Touches: For a soft, magical look, apply edible glitter sparingly to specific areas. For example, you can lightly dust the top of the cake or cupcakes, or sprinkle a bit on the tips of the unicorn’s mane or around the unicorn horn.
- Highlighting Features: Glitter is great for accentuating specific features on a cake. For a unicorn-themed design, the horn, ears, and mane are perfect areas to apply glitter. You can lightly dust the horn with gold or silver glitter to make it stand out, or add a soft, pastel shimmer around the edges of the mane.
- Borders and Edges: Glitter can be used to enhance the borders or edges of a cake. For example, sprinkle some glitter on the rim of a cake board or around the outer edges of a cake’s frosting. This adds an extra layer of sparkle without overwhelming the entire design.
- Centrally on the Cake: If you’re going for a bolder look, you might want to apply glitter in a more centralized area. However, even in these cases, focus on one or two key areas rather than covering the entire cake. For example, a glittery starburst effect around the center of the cake or a sprinkle of glitter over the unicorn’s eyes can create a focal point of sparkle.
3. Applying Glitter with Precision
To avoid accidentally over-applying glitter and to ensure it’s applied precisely where you want it, there are a few techniques you can use:
- Use a Fine-Mesh Sifter: A fine-mesh sifter or sieve can help you evenly dust the edible glitter over the cake or cupcakes. Simply place the glitter in the sifter and gently tap it over the surface, creating a light and even layer. This technique works especially well for fine glitter.
- Piping or Detail Brushes: For more controlled application, you can use a small paintbrush or a piping bag with a fine tip to apply glitter to specific areas. This is especially useful if you’re decorating small areas like the tips of the unicorn’s ears or the mane’s curls.
- Sprinkle by Hand: For chunkier glitter or a more intentional “scatter” effect, you can gently sprinkle the glitter with your fingers over the desired areas. Hold your hand above the cake and use a gentle, steady motion to apply a small amount of glitter where it’s needed.
- Spray Glitter: Some edible glitter comes in spray form, which allows for a light misting over larger areas. This can give your cake a subtle shimmer, especially if you want a uniform, soft sparkle across the entire surface of the cake. Be careful to spray from a distance so the glitter is applied evenly without clumping.
4. Balancing Glitter with Other Decorations
Edible glitter is a stunning decoration, but it’s important to balance it with other elements on your cake to avoid a cluttered look. Keep in mind that glitter should complement other decorations rather than overpower them.
- Pairing with Buttercream or Fondant: When using edible glitter, make sure it works well with your frosting or fondant. Glitter works beautifully over smooth buttercream or glossy fondant, as the shine of the glitter complements the smooth finish. If your frosting is too textured or has a rough surface, glitter might not adhere evenly, which can detract from the desired look.
- Adding Other Decorative Elements: If you’re using edible glitter, make sure it doesn’t compete with other key design elements, such as a unicorn horn, flowers, or other edible decorations. For instance, if you’ve already created a beautiful unicorn horn using gold fondant or modeling chocolate, lightly dusting it with glitter will enhance it without stealing focus. Too much glitter around the horn, however, may detract from its prominence.
5. Knowing When to Stop
One of the most common mistakes when using edible glitter is applying too much, resulting in a glittery overload that detracts from the overall aesthetic. The key to a sophisticated and magical cake design is restraint.
- Less is More: Always remember that glitter should be used as an accent, not the focal point of the cake. Start with a small amount and step back to assess if more is needed. It’s easier to add a little more glitter than it is to remove excess.
- Test as You Go: If you’re unsure how much glitter to apply, it’s always best to test by adding a little at a time. Apply a light dusting to a small section and step back to evaluate how it looks from a distance. You can always add more, but you can’t take glitter away once it’s applied.
- Consider the Setting: Glitter tends to shine more in certain lighting, so consider the setting where you’ll be displaying the cake. If it’s under bright lights or at an outdoor event, the glitter will naturally reflect more light, giving off a more intense sparkle. In dimmer settings, a lighter application will still look beautiful without overwhelming the design.
6. Storing Glittered Cakes
If you’re decorating a cake with edible glitter in advance, be aware that it can lose some of its sparkle if exposed to moisture or humidity. To preserve the glitter’s effect:
- Avoid Refrigeration: If possible, avoid refrigerating the cake after glitter has been applied, as condensation can cause the glitter to lose its shine and become dull.
- Cover the Cake: If refrigeration is necessary, cover the cake loosely with plastic wrap or place it in a cake box to protect the glitter from moisture. When serving, let the cake come to room temperature before cutting so the glitter retains its sparkle.
Final Thoughts: Adding Sparkle with Subtlety
Edible glitter adds a magical touch to your unicorn-themed cake or cupcakes when used thoughtfully. Apply it with precision and balance it with other elements to create a sparkling masterpiece without overwhelming the design. Remember: a little glitter goes a long way!
Shaping Fondant Decorations: Crafting Unicorn Horns, Ears, and Flowers
Fondant is a versatile, smooth icing that can be molded and shaped into a variety of decorations. It’s an essential tool in creating intricate, custom decorations for a unicorn-themed cake. From the iconic unicorn horn and ears to delicate flowers, fondant allows you to bring your design to life with beautiful, precise details. Here’s a detailed guide on how to craft these essential fondant decorations with ease.
1. Crafting the Unicorn Horn
The unicorn horn is a key feature of a unicorn cake and can be easily crafted from fondant using various techniques, from a spiral design to a sleek, smooth shape.
- Step-by-Step Instructions:
- Prepare the Fondant: Begin by kneading white fondant until it’s smooth and pliable. If you want a colored horn, you can knead in a bit of gel food coloring to create a pastel pink, lavender, gold, or other magical hues.
- Roll the Fondant into a Log: Roll a small amount of fondant into a log shape. The log should be about 6-8 inches long, depending on the size of your cake. The thickness of the log will determine how thick the horn will appear, so aim for a log with a slight taper from base to tip, with one end being wider and the other narrowing into a point.
- Create the Spiral: To give the horn its iconic twist, take the fondant log and gently twist it between your hands. As you twist, use your fingers to elongate the shape, making sure to keep it smooth and even. The log should look like a tapered cone with a spiral pattern around it.
- Smooth and Shape: Once you’ve achieved the desired spiral twist, smooth out any imperfections with your fingers or a fondant smoother. You can gently press or roll the base of the horn to ensure it’s stable and will stand upright on the cake.
- Add Texture (Optional): If you want to add a more realistic, textured look to your unicorn horn, you can use a tool like a fondant or pasta roller with a texture mat or an embossing tool to create ridges along the spiral. Alternatively, you can leave the surface smooth for a sleek, polished look.
- Dry the Horn: Let the horn dry for at least 6-8 hours (or overnight) so that it becomes firm and can stand up on the cake. You can insert a wooden skewer or toothpick into the bottom of the horn before it fully sets to help secure it into the cake later.
2. Shaping the Unicorn Ears
Unicorn ears add a touch of whimsy and charm to your cake. Shaping them from fondant is fairly simple, and you can easily customize them by adding details like inner ear accents or glitter to enhance the magical look.
- Step-by-Step Instructions:
- Prepare the Fondant: Start with white fondant for the base of the ears. For a more colorful look, you can tint the fondant with pink, purple, or pastel colors for the inner ear details.
- Shape the Base of the Ears: Roll out a small ball of white fondant and gently elongate it into a teardrop shape. The wider end will be the base of the ear, while the pointy end will be the tip of the ear. Gently pinch the sides of the shape to create the pointy, triangular appearance of the ear.
- Create the Inner Ears: To create the inner part of the ears, roll out a small piece of fondant in your chosen color (pink, lavender, etc.). Cut out small, almond-shaped pieces, making sure they fit inside the larger ear shapes.
- Attach the Inner Ears: Lightly brush the back of the inner ear pieces with water or edible glue to help them stick to the base of the ear. Position the inner ears so they look naturally placed within the larger ear. You can curve the inner ear slightly for a more realistic appearance.
- Shape and Attach the Ears to the Cake: Allow the ears to dry and firm up for several hours. Once dry, position them on the cake. If needed, you can use a bit of edible glue or royal icing to attach the ears to the cake. For extra stability, you can insert small toothpicks or skewers into the base of the ears and place them gently into the top of the cake.
- Add Details (Optional): You can embellish the ears by adding a dusting of edible glitter, painting them with edible luster dust, or even using a small tool to add texture to the fondant, making the ears look more realistic.
3. Shaping Fondant Flowers (For a Magical Mane or Decorations)
Fondant flowers are key to a unicorn cake’s design, adding vibrant accents to the mane, horn, and ears. They can range from simple to intricate, with many shapes to choose from.
- Step-by-Step Instructions:
- Prepare the Fondant: Begin by kneading fondant and dividing it into small pieces. You can use any color you like, but soft pastels like pink, lavender, yellow, and blue are ideal for a unicorn theme. If desired, you can add a bit of tylose powder to the fondant to make it more pliable and quicker to set.
- Rolling and Cutting the Petals: Roll out the fondant to about 1/8-inch thickness on a smooth surface. Use a flower cutter or a sharp knife to cut out flower shapes. You can use simple petal shapes for flowers like daisies, roses, or small pansy-type flowers. If you don’t have a cutter, you can also freehand-cut the petals into the desired shape.
- Shaping the Petals: To give the petals more dimension and life, use a ball tool or a soft, rounded tool to thin the edges of the petals. Place each petal over a foam pad and gently roll the edges with the ball tool to make them curve and look more natural.
- Assembling the Flower: For most simple flowers, stack the individual petals, overlapping each one as you go, and pinch them together at the center to secure them. For a more intricate flower, such as a rose, layer the petals around the center, gradually increasing the size of the petals as you go outward. You can also add a small ball of fondant to the center to represent the flower’s stamen.
- Drying and Attaching the Flowers: Once the flowers are assembled, allow them to dry and firm up. This can take several hours or overnight, depending on the size of the flowers. Once dry, they can be arranged around the unicorn horn or along the mane. Use a small amount of edible glue or royal icing to attach them to the cake, or insert small wires into the stems if you want to position them more precisely.
- Adding Details (Optional): You can add extra details to the flowers, such as tiny sugar pearls in the centers, a dusting of edible glitter, or painting them with edible luster dust to make them shimmer and shine.
4. Tips for Perfect Fondant Decorations
- Use Tylose Powder for Quick Drying: If you need your fondant decorations to set quickly, mix in a small amount of tylose powder. This will make the fondant firmer and speed up the drying process, helping your decorations hold their shape when placed on the cake.
- Work on a Clean Surface: When shaping fondant, it’s important to work on a clean, smooth surface. Use a silicone mat, parchment paper, or a clean countertop to avoid dirt or crumbs from sticking to the fondant. Additionally, lightly dust your work surface with cornstarch or powdered sugar to prevent the fondant from sticking.
- Keep the Fondant Covered: Fondant dries out quickly when exposed to air, so keep the unused fondant wrapped tightly in plastic wrap or placed in an airtight container to prevent it from hardening.
- Use Edible Glue or Water: Edible glue or a small amount of water can be used to attach fondant decorations to the cake. Just brush a thin layer on the back of each piece before adhering it to the cake. Be careful not to use too much liquid, as it can cause the fondant to become too soft and difficult to handle.
Final Thoughts: Adding the Magic with Fondant
Crafting fondant decorations like horns, ears, and flowers lets you personalize your cake with whimsical, magical details that bring the unicorn to life. Whether you’re a beginner or an experienced cake decorator, shaping fondant is an enjoyable and rewarding part of cake design. With patience and practice, you’ll be able to create fondant decorations that are as enchanting as the unicorns themselves!
Troubleshooting Common Issues: Fixing Uneven Frosting or Drooping Decorations
Even with the most careful planning, decorating cakes can sometimes result in a few challenges. Uneven frosting, drooping decorations, or imperfect finishes can occasionally arise, especially in humid conditions or when you’re working with intricate designs like unicorn-themed cakes. Luckily, there are several troubleshooting techniques to address these issues and ensure that your cake looks as perfect as you envisioned. Here’s a guide to fixing common decorating problems.
1. Fixing Uneven Frosting
One of the most common problems cake decorators encounter is uneven frosting, whether it’s lumps, smears, or areas that look patchy. This issue can stem from several factors, but there are steps you can take to smooth everything out and create a flawless finish.
- Cause 1: Buttercream Consistency Issues
Solution: If your frosting is too thick or too thin, it can cause uneven coverage and texture.- Too Thick: If your buttercream is too stiff, it will be difficult to spread evenly across the cake, and you may notice ridges or thick areas. To fix this, add a small amount of milk or cream (1 teaspoon at a time) and mix it in until the frosting reaches a smoother, more spreadable consistency.
- Too Thin: If your buttercream is too thin and runs off the cake, you can add more powdered sugar to thicken it. Sift the sugar into the frosting gradually, mixing as you go, until the frosting holds its shape.
- Cause 2: Lack of Crumb Coat
Solution: Not applying a crumb coat can lead to uneven frosting, especially if there are loose crumbs from the cake’s surface.- Apply a thin layer of frosting (the crumb coat) over the entire cake to seal in crumbs. Chill the cake in the fridge for at least 30 minutes after the crumb coat to allow it to set, which will give you a smooth surface to work with when applying the final layer of frosting.
- Cause 3: Uneven Application
Solution: When applying frosting, use a cake scraper or an offset spatula to create an even surface.- Start by applying a generous amount of frosting to the top of the cake and spread it evenly toward the edges. Then, using a cake scraper, gently smooth the sides. Keep the scraper at a 90-degree angle to the cake’s surface to ensure even application. If you’re dealing with multiple layers of frosting, use the scraper to smooth each layer before applying the next.
- Cause 4: Humidity or Temperature Problems
Solution: Excess humidity or heat can cause buttercream to soften and become difficult to work with.- Ensure your cake and frosting are stored in a cool, dry area while you’re decorating. If the frosting becomes too soft, refrigerate the cake for 10-15 minutes to firm it up before continuing. This will allow you to smooth out the frosting without it melting or becoming too runny.
2. Fixing Drooping Decorations
Drooping decorations can be a frustrating issue, especially when you’ve put a lot of effort into creating intricate fondant shapes or piping delicate details. Whether it’s fondant flowers, unicorn horns, or other decor, drooping can happen if the decorations aren’t set properly or the environment is too warm.
- Cause 1: Fondant or Decorations Not Dry Enough
Solution: If your fondant decorations are too soft or haven’t dried properly, they may droop when placed on the cake.- Allow your fondant pieces to dry completely before placing them on the cake. This includes decorations like flowers, ears, horns, and even smaller fondant accents. Depending on the humidity and thickness of the fondant, drying times can range from several hours to overnight. If you’re in a rush, you can use a fan or a dehydrator to speed up the process.
- If your fondant decorations are already on the cake and they’re starting to droop, carefully remove them and let them dry completely before replacing them.
- Cause 2: Incorrect Support for Heavier Decorations
Solution: Heavier decorations like large fondant flowers, horns, or chocolate pieces may need extra support to stay in place.- Use skewers, toothpicks, or even a small piece of wire inserted into the base of the decoration to give it extra support. For a unicorn horn, inserting a wooden skewer inside the fondant horn can help keep it upright and prevent drooping.
- If you have multiple layers of fondant flowers, consider placing small pieces of foam or floral wire between the layers to add stability. This is particularly useful for arrangements like a flower crown or cascading flowers down the cake.
- Cause 3: Excessive Moisture or Heat
Solution: Fondant and buttercream decorations can soften and start to droop when exposed to excessive moisture or heat.- If you’re working in a warm or humid environment, try refrigerating the cake before or during decoration to set the frosting and decorations. Just be sure to allow the cake to come to room temperature before serving to avoid condensation forming on the decorations.
- Keep the cake away from direct sunlight or warm areas in your kitchen. If you need to transport the cake, try using a cooler box or an air-conditioned space to prevent heat from affecting the cake’s stability.
3. Fixing Cracked or Dry Fondant
Cracks or dryness in fondant can occur if it’s rolled too thin, exposed to air too long, or worked in a dry environment.
- Cause 1: Fondant Was Rolled Too Thin
Solution: Fondant that’s rolled too thin can easily crack, especially when covering a large cake.- Roll your fondant out to a thickness of about 1/8-inch, ensuring it’s thick enough to hold its shape without cracking. If cracks occur, gently smooth the cracked area with your hands, or use a fondant smoother to fix any imperfections.
- Cause 2: Fondant Exposed to Air
Solution: If fondant is exposed to air for too long, it can dry out and become brittle, causing cracks or hard spots.- Always cover your fondant with plastic wrap when not in use to keep it moist. If it starts to dry out, you can knead a small amount of vegetable shortening into the fondant to restore its pliability.
- Cause 3: Humidity and Environmental Factors
Solution: In humid environments, fondant can become sticky or soft, making it difficult to handle. In dry environments, fondant may dry out too quickly and crack.- To fix this, consider using a humidifier or dehumidifier depending on your local climate. If fondant becomes too sticky, dust it lightly with cornstarch or powdered sugar to make it easier to handle. If it becomes too dry, apply a small amount of vegetable shortening to soften it.
4. Fixing Drips or Unintended Drip Effects
Sometimes, a drip effect from your icing or ganache can go too far, making it look messy rather than intentional. Here’s how to fix it:
- Cause 1: Too Much Ganache or Drip Icing
Solution: If you’re using a drip effect with ganache or icing, too much can cause it to spill down the sides of the cake in an uncontrolled way.- Use a spoon or squeeze bottle to carefully control the amount of ganache or icing you apply. It’s best to let the ganache set a bit before applying it, which can help prevent it from dripping too much. If the drip effect is uneven, smooth out the edges with a spatula to create a more uniform look.
- Cause 2: Not Letting Ganache Cool to the Right Temperature
Solution: Ganache that’s too warm may run down the cake too quickly, while ganache that’s too cool may not flow smoothly.- Let the ganache cool slightly before using it, or test it by drizzling a small amount on the edge of the cake. The ideal temperature is warm enough to pour, but not so hot that it runs uncontrollably.
Final Thoughts: Troubleshooting with Patience and Precision
Cake decorating can be challenging, but issues like uneven frosting, drooping decorations, or cracking fondant can be fixed. By understanding the causes and applying the right solutions, you can turn setbacks into a polished creation. Patience, preparation, and attention to detail are essential to achieving your perfect unicorn cake
Unicorn Cakes for Every Occasion
Kids’ Birthday Parties: Fun and Colorful Designs to Excite Young Guests
Kids’ birthday parties are filled with fun, creativity, and vibrant energy, with the cake often being the focal point. A playful, colorful design, like a unicorn or favorite character, adds excitement to the celebration. This guide will show you how to create cakes that match the fun and delight of the party.
1. Colorful Rainbow Cakes
Rainbow-themed cakes are a hit at kids’ birthday parties because they instantly evoke happiness, excitement, and a sense of magic. The vibrant layers of color add a sense of joy and whimsy to the party atmosphere.
- Why It Works: The rainbow design is playful, eye-catching, and perfect for a variety of party themes. From unicorns to general celebration themes, rainbows instantly create a festive mood.
- How to Make It:
- Colorful Layers: Start by making a batch of white cake batter, then divide it into 5-6 bowls. Add a different gel food coloring to each bowl to create bright colors like red, orange, yellow, green, blue, and purple.
- Layer the Cake: Bake each colored batter separately, making sure each layer is even in height. When stacking the layers, alternate the colors for a rainbow effect, ensuring the colors are visible when the cake is sliced.
- Decorate with Icing: Frost the cake with a smooth, white buttercream to let the rainbow layers pop. You can create a piped design using the same rainbow colors for added texture or add sprinkles in matching colors.
- Fun Additions: Add small candy decorations, such as gummy bears or rainbow lollipops, on top to make the cake even more playful. You can also sprinkle edible glitter for extra magic!
2. Animal-Themed Cakes: Cute and Whimsical Designs
Animal cakes are always a favorite among kids. Whether it’s a lion, a panda, a bunny, or a unicorn, animal cakes allow for a huge amount of creativity and fun details, making them perfect for a party where you want to delight young guests.
- Why It Works: Animal themes are versatile, and kids love seeing their favorite creatures brought to life in cake form. These cakes often include fun, cartoonish elements that make them look less formal and more like a toy or character.
- How to Make It:
- Choosing the Animal: Pick a popular animal that resonates with the birthday child. Some favorites include cute jungle animals like lions, giraffes, and monkeys, as well as domesticated animals like cats, dogs, or farm animals like cows and pigs.
- Fondant Details: Use fondant to create the animal’s features—ears, noses, eyes, and other small details. For example, to make a panda cake, you could use black and white fondant to form the panda’s ears and eyes. If it’s a bunny cake, soft pastel-colored fondant works wonderfully for the ears, nose, and whiskers.
- The Cake Shape: Depending on the animal you choose, the cake can be shaped into the form of the animal’s face or full body. A lion’s face, for instance, can be a round cake with fondant or piped buttercream for the mane. For a panda or bear, consider baking the cake in the shape of the animal’s round face and then decorating with black and white icing or fondant.
- Fun Additions: You can add little details like edible flowers, fruit, or themed toppers (like small plastic animals or characters) to enhance the animal theme.
3. Character Cakes: Bring Popular Characters to Life
Kids love celebrating with their favorite characters from TV shows, movies, books, and cartoons. Whether it’s superheroes, princesses, or animated favorites, character cakes are a guaranteed crowd-pleaser.
- Why It Works: Kids enjoy having their favorite characters integrated into the party, and a cake that mirrors a beloved character is the perfect showstopper. These cakes often create a memorable, magical moment when the birthday child sees their favorite character in edible form.
- How to Make It:
- Pick the Character: Popular characters include superheroes like Spider-Man, princesses like Elsa from Frozen, or animated characters like SpongeBob or the Minions. Be sure to choose a character that resonates with the birthday child’s interests.
- Cake Design: Depending on the character, the cake can be made in a variety of shapes. For example, a Spider-Man cake might be a round cake decorated to resemble his face with red and blue fondant, while a Frozen-themed cake could feature an ice castle with Elsa’s figure as the centerpiece.
- Use of Edible Images: For a quick and easy character design, you can use edible image printing. Edible images are prints of your character that can be placed directly on the cake. This allows you to include intricate designs like a superhero’s costume or a princess’s gown with precision.
- Fun Additions: Add edible confetti or fondant accents to mimic the character’s surroundings or accessories. For example, for a Spider-Man cake, you could add a fondant web or use edible glitter for a touch of magic for a princess.
4. Cupcake Cakes: Mini Individual Treats for Guests
Cupcakes are a great option for kids’ parties because they’re easy to serve, don’t require cutting, and can be personalized for each guest. Cupcake cakes combine the individual charm of cupcakes with the large-scale visual impact of a traditional cake.
- Why It Works: Cupcake cakes are perfect for large parties where you want to serve each child an individual treat, while still creating a cohesive, large cake display. You can form the cupcakes into a larger shape—like a unicorn or a favorite character—and decorate them in a way that ties all the cupcakes together.
- How to Make It:
- Bake Cupcakes: Start by baking a batch of cupcakes in bright colors or themed colors that match the party. For example, if you’re doing a unicorn theme, you could bake rainbow-colored cupcakes to go inside.
- Assemble the Shape: Arrange the cupcakes into a large shape, such as a heart, star, or even a simple circle. For more intricate designs, like a unicorn or animal face, arrange the cupcakes accordingly to form the larger image.
- Frost and Decorate: Frost each cupcake individually or create a smooth layer over the top to form a unified look. Use different colored icing to create fun designs like horns, ears, or facial features. You can also use fondant or edible decorations for additional flair.
- Fun Additions: You can top each cupcake with themed toppers like mini toys, edible glitter, or candy pieces. Cupcake cakes are particularly great for customizing each one for the party guests.
5. Interactive Cakes: Fun, Edible Surprises Inside
An interactive cake adds an extra level of excitement for kids, combining both visual appeal and edible surprises. Cakes with hidden surprises, like candy or colorful fillings, can be a huge hit at a birthday party.
- Why It Works: Interactive cakes are a fun way to engage children and keep them excited. The surprise element adds a magical touch, making the cake reveal even more fun when it’s cut open and colorful elements spill out.
- How to Make It:
- Hidden Fillings: Create a cake with layers of colorful candy, sprinkles, or even surprise toys hidden inside. To do this, bake a hollow cake by cutting a hole into the center of each layer and filling it with colorful M&Ms, gummy bears, or mini marshmallows.
- Layering for Effect: For a rainbow surprise, you can use colored batter inside each layer so that when the cake is sliced, each section is revealed in a rainbow gradient.
- Decorative Finish: Frost the cake as usual, but leave the surprise hidden inside. Once it’s time for the big reveal, slice into the cake and watch the kids’ faces light up as the candy or colorful layers tumble out.
- Fun Additions: Pair this with a piñata cake, where the cake has candy or confetti inside, or use a “pull-apart” cake filled with frosting and candy inside for another fun twist.
Final Thoughts: Cake Designs That Spark Joy and Excitement
When it comes to kids’ birthday parties, the cake is often the centerpiece that sets the tone for the celebration. Fun, colorful designs are perfect for keeping young guests engaged and excited. Whether you choose a vibrant rainbow cake, an adorable animal-themed creation, a favorite character design, or an interactive surprise cake, the goal is to make the experience joyful and memorable. With playful designs and attention to detail, your cake will not only be delicious but also an exciting part of the birthday celebration!
Baby Showers: Soft Pastels and Elegant Touches for a Subtle Theme
Baby showers are special occasions filled with joy, anticipation, and the excitement of welcoming a new life. The cake is often the centerpiece of this celebration, and when it comes to baby showers, a soft and elegant design is key to setting the right tone for the event. Think soft pastels, gentle textures, and subtle details that reflect the sweetness of the occasion. Whether you’re expecting a boy, girl, or keeping it a surprise, baby shower cakes should feel warm, delicate, and sophisticated, without being too bold or overpowering. Here’s how you can create beautiful, refined cakes that reflect the gentle nature of this special event.
1. Soft Pastel Color Palettes
Soft pastels are the hallmark of baby shower cakes, evoking feelings of warmth, comfort, and serenity. Light shades of pink, blue, lavender, mint, peach, and yellow create a gentle atmosphere perfect for welcoming a new baby. These colors also work well for both themed and non-themed cakes, offering versatility and elegance.
- Why It Works: Pastel colors are calming and soothing, making them ideal for a baby shower’s serene ambiance. They provide a timeless, classic look while maintaining a fresh, modern appeal. Soft pastels also allow for plenty of creative freedom in the design, whether you want a more minimalist approach or a cake with intricate details.
- How to Make It:
- Color Mixing: Start with white buttercream and mix in small amounts of gel food coloring to achieve the desired pastel shades. Keep in mind that pastel colors are subtle, so you only need a tiny bit of coloring to achieve the perfect tone.
- Layered Colors: Consider using a gradient effect or a soft ombré design by gradually transitioning from one pastel shade to another. For example, a pink-to-peach gradient or a light blue-to-lavender ombré looks both elegant and soft.
- Neutral Accents: To balance the pastel tones, consider incorporating neutral accents like white or ivory. This will prevent the cake from becoming too saturated with color and will enhance the soft, elegant feel of the design.
- Fun Additions: Use pastel-colored macarons, candies, or sprinkles as small decorations on top of the cake. These elements not only add texture but also maintain the delicate theme.
2. Elegant Floral Details
Floral accents are a great way to add an elegant, delicate touch to a baby shower cake. Fresh flowers or sugar flowers in soft hues can transform a simple cake into a sophisticated centerpiece that complements the overall decor of the shower.
- Why It Works: Flowers are timeless symbols of new beginnings, making them perfect for a baby shower. Their natural beauty and variety of colors provide endless options for customization. Whether you choose fresh or edible sugar flowers, these details add dimension and refinement to the cake.
- How to Make It:
- Sugar Flowers: You can either buy pre-made sugar flowers or create your own using fondant or gum paste. Popular flowers for baby shower cakes include roses, peonies, lavender, or baby’s breath, all of which align with soft, feminine aesthetics. To make the cake feel more personalized, opt for colors that match the shower’s theme, such as pale pink roses or soft yellow daisies.
- Fresh Flowers: If you’re using fresh flowers, choose non-toxic varieties that are safe for cakes, such as roses, lavender, or hydrangeas. Be sure to clean the flowers thoroughly and consider placing them in a protective wrapping or a floral pick to prevent direct contact with the cake surface. Arrange them around the edges of the cake or use them as focal points on the top.
- Fun Additions: To add more texture to the floral theme, you could drizzle a little edible glitter over the flowers or create a sugar veil using isomalt to give the appearance of delicate lace.
3. Elegant Textures: Ruffles, Lace, and Drapes
Textures add depth and sophistication to a baby shower cake, and techniques like ruffles, lace, and draping can create a luxurious look. These textural elements work beautifully with the soft pastel color scheme, enhancing the cake’s elegance without overwhelming the design.
- Why It Works: Textures like ruffles and lace give the cake a more intricate and formal feel, which is ideal for the refined atmosphere of a baby shower. These delicate, flowing patterns mimic the softness and beauty of the occasion, and they add a touch of timeless charm.
- How to Make It:
- Ruffled Buttercream: Ruffles can be easily achieved with buttercream by using a piping bag fitted with a petal tip. Start at the bottom of the cake and pipe soft, ruffled layers of frosting as you move upward. You can alternate the colors of your buttercream to create a subtle ombré effect or keep it in one shade for a more uniform look.
- Fondant Draping: Fondant drapes elegantly over the cake and can be manipulated into soft folds. To create this effect, roll out a thin sheet of fondant, then carefully drape it over the sides of the cake to create gentle, flowing layers. You can secure the drapes with small fondant pearls or lace patterns for added sophistication.
- Lace and Ribbon Accents: Fondant lace appliqués or edible lace sheets are perfect for adding intricate detailing to a baby shower cake. These can be placed around the edges of the cake or as a topper. For a softer touch, use edible lace to create a delicate “veil” over the top or sides of the cake.
- Fun Additions: You can also incorporate delicate, edible metallic accents like gold or silver leaf into the textures for a bit of extra shine. These metallic elements will catch the light and give the cake a luxurious, sophisticated look.
4. Baby-Themed Accents: Subtle and Classy
When decorating a baby shower cake, it’s important to include baby-themed accents, but it’s also essential to keep these details subtle and sophisticated. Rather than going for a full-on cartoonish design, choose soft, minimalist touches that reflect the theme in an elegant way.
- Why It Works: Simple baby-themed accents, such as onesies, baby booties, or bottles, can make the cake feel personal and appropriate for the occasion. When executed tastefully, these elements can enhance the cake’s charm without overwhelming the soft, elegant tone of the celebration.
- How to Make It:
- Baby Icons: Use fondant or royal icing to create small, minimalist baby icons such as baby shoes, rattles, pacifiers, or storks. For a more delicate approach, consider keeping the icons small and subtly placed, such as on the side of the cake or at the cake’s base.
- Banners and Baby Name: Add a small fondant banner with the baby’s name or a simple “Baby Shower” message. A delicate ribbon made of fondant or edible lace could add a festive yet elegant flair to the cake without overwhelming the overall design.
- Personalized Touches: If the baby’s gender is known, consider incorporating its name, initials, or birth date in a soft and understated font. This gives the cake a personal touch while keeping the design classic.
- Fun Additions: You can add little fondant animals, such as baby elephants or teddy bears, which can be placed near the top or on the cake’s edges for a cute and elegant look.
5. Interactive Cakes: Surprises for Guests
Adding a fun surprise inside the cake can make the baby shower even more memorable. Interactive cakes, such as those with hidden colored layers or confetti, are a great way to surprise and delight guests.
- Why It Works: These cakes not only look beautiful on the outside but also create a magical moment when they’re sliced open, adding an element of surprise and excitement for the guests.
- How to Make It:
- Colorful Cake Layers: For a gender-reveal twist, use colored cake layers inside the cake (pink or blue, depending on the baby’s gender). When the cake is cut, the color inside will reveal the baby’s gender, creating a moment of celebration and surprise.
- Confetti Surprise: You can fill the inside of the cake with edible confetti or sprinkles that spill out when the cake is cut. This adds a playful touch without detracting from the overall elegance of the design.
- Fun Additions: Use edible glitter inside the cake for a magical, shimmering effect when it’s cut, enhancing the surprise with a touch of sparkle.
Final Thoughts: A Soft and Elegant Cake for a Memorable Baby Shower
When designing a cake for a baby shower, the goal is to create something that is both beautiful and meaningful. Soft pastels, elegant textures, and subtle baby-themed accents combine to create a cake that exudes warmth, love, and anticipation for the new arrival. The key is to strike a balance between sophistication and playfulness, ensuring that the cake is visually appealing and fitting for the joyful occasion. With the right touches, your cake will be a memorable and elegant centerpiece that makes the baby shower even more special.
Holiday Unicorn Cakes: Ideas for Christmas, Halloween, or Other Festive Themes
Unicorn cakes are a fun, magical treat that can be customized for any holiday or festive celebration. Combining the whimsical charm of unicorns with the joy and spirit of the season creates a delightful and unique dessert that will thrill guests of all ages. Whether you’re celebrating Christmas, Halloween, or another special holiday, you can easily adapt the classic unicorn design to fit the theme of the event. Here’s how you can bring holiday magic into your unicorn cake designs for different occasions.
1. Christmas Unicorn Cake: A Magical Winter Wonderland
Christmas is all about joy, togetherness, and a bit of festive sparkle, making it the perfect time to create a unicorn cake that embodies the whimsy and wonder of the season. With its soft pastel colors and hints of snowy magic, a Christmas unicorn cake will be a stunning centerpiece for your holiday celebrations.
- Why It Works: Unicorns already have a magical feel, and combining them with the coziness and warmth of Christmas creates a cake that is both enchanting and festive. The pastel color scheme of unicorn cakes can be easily adapted with wintery shades like icy blue, mint green, or soft lavender to evoke a sense of winter wonderland.
- How to Make It:
- Snowy Design: Frost the cake with a smooth, white buttercream to create the look of fresh snow. Add a touch of glitter or edible shimmer for a sparkly, frosty effect.
- Winter Unicorn Horn: Create the unicorn horn using fondant or modeling chocolate. For Christmas, you can decorate the horn with edible gold or silver glitter, or use a candy cane design (red and white stripes) to match the holiday theme.
- Festive Ears and Eyes: Keep the unicorn ears simple with fondant, but consider adding Christmas-themed accessories, such as a holly leaf on the horn or a small red bow.
- Pastel Christmas Colors: Incorporate traditional Christmas colors—soft reds, greens, golds, and silvers—into the mane and tail. Use buttercream or fondant in these shades to pipe a fluffy, whimsical mane that’s decorated with tiny edible snowflakes or sparkling stars.
- Decorative Elements: Enhance the holiday theme by adding elements like snowflakes, mini reindeer, or little presents around the cake. Edible glitter or silver dragees can be used to create the look of snow or a frosty shimmer.
- Fun Additions: You can use mini fondant Christmas trees or tiny sugar reindeer around the base of the cake. Consider making a wintery unicorn scene with edible marshmallows shaped like snowballs or powdered sugar to mimic falling snow.
2. Halloween Unicorn Cake: A Spooky, Whimsical Twist
Halloween is all about creativity and fun, and adding a unicorn to this spooky season can bring a playful and unexpected twist. Imagine a unicorn with dark, moody colors, glittery elements, and spooky accessories. A Halloween unicorn cake is a fun way to balance the magic of unicorns with the spookiness of the holiday.
- Why It Works: Halloween-themed cakes are often filled with dark, dramatic colors, and unicorns can be adapted into this theme by giving them a darker, mystical feel. Combining the enchanting world of unicorns with Halloween icons like pumpkins, bats, and cobwebs creates a whimsical yet eerie cake that’s perfect for the season.
- How to Make It:
- Dark, Moody Colors: Instead of the usual pastel hues, opt for darker tones like deep purples, blacks, and oranges. Use black or deep purple buttercream to frost the cake, and add a silver or gold unicorn horn to maintain the magical element.
- Spooky Unicorn Horn: The unicorn horn can be decorated with a spooky twist—paint it black with edible black glitter, or create a marbled effect using orange and black fondant to represent the Halloween vibe.
- Spooky Ears: Decorate the unicorn’s ears with small accents, such as mini bats or ghosts made from fondant, or use candy corn or other Halloween-themed candies as an additional element.
- Halloween-Themed Mane: For the unicorn’s mane, use dark shades like black, deep purple, and blood red for an edgier, mystical look. You can create the mane with buttercream piped into curls or swirls, and sprinkle in some edible glitter for a bit of sparkle.
- Decorative Elements: Add Halloween decorations such as mini fondant pumpkins, spider webs, or small fondant skulls around the base or on top of the cake. A sprinkling of edible black glitter or candy bats will tie the theme together.
- Fun Additions: To make the cake extra spooky, add some glowing edible eyes or incorporate fondant eyes into the design, giving the cake an eerie, magical quality. Candy eyes or black fondant roses can be used for an even spookier touch.
3. Easter Unicorn Cake: A Sweet Spring Celebration
Easter is a time of renewal, springtime blooms, and pastel colors, making it a perfect occasion to combine the whimsical magic of unicorns with the freshness of the season. Think soft pastel colors, spring flowers, and a joyful, celebratory vibe for an Easter unicorn cake.
- Why It Works: Easter’s gentle pastels and floral themes can be easily paired with a unicorn design. The cake can feel like a springtime dream come true, combining the magic of a unicorn with the fresh, floral elements of Easter.
- How to Make It:
- Soft Pastel Palette: Use soft pinks, yellows, lavender, mint greens, and blues to frost the cake and create the unicorn’s mane. This will give the cake a light, airy feel that’s perfect for spring.
- Floral Unicorn Horn: Decorate the unicorn’s horn with fondant or buttercream flowers, such as roses, daisies, or lavender, to evoke the blooming beauty of Easter. A soft golden hue for the horn will maintain the magical quality of the unicorn.
- Sweet Ears and Eyes: Create delicate ears using fondant, and embellish them with a small fondant bow or flowers. The unicorn’s eyes can be large, soft, and childlike, giving the cake an endearing and joyful expression.
- Floral Mane: Add a pastel-colored floral mane using piped buttercream or fondant flowers. Incorporate small edible flowers like violets, daisies, or pansies to make the cake feel more like an Easter garden.
- Decorative Touches: Around the base of the cake, add edible Easter eggs, chocolate bunnies, or tiny fondant chicks. You can also sprinkle the cake with edible glitter for a magical, springtime sparkle.
- Fun Additions: Consider adding edible grass made from green-colored coconut or shredded fondant to the base of the cake, and place small fondant or chocolate eggs or bunnies around the cake to evoke the Easter egg hunt tradition.
4. Valentine’s Day Unicorn Cake: A Love-Filled Whimsy
Valentine’s Day is all about love, hearts, and sweet gestures, making it the perfect holiday for a whimsical, love-filled unicorn cake. Think soft pinks, reds, and golds combined with hearts and romantic details for a cake that’s as sweet as it is magical.
- Why It Works: Valentine’s Day’s focus on love and romance makes it easy to incorporate a unicorn theme, which symbolizes both magic and sweetness. The cake can feel romantic, dreamy, and perfect for a celebration of love.
- How to Make It:
- Romantic Color Palette: Use rich reds, soft pinks, and whites for the cake’s design. The unicorn’s mane can be decorated in pink, white, and gold hues to keep it feeling festive and romantic.
- Heart-Shaped Unicorn Horn: Shape the unicorn’s horn into a subtle heart shape using fondant or modeling chocolate, and cover it with edible gold leaf or glitter to add a touch of elegance.
- Sweet Ears and Eyes: Keep the unicorn’s ears delicate, perhaps adding a soft, pink bow or heart accents. The eyes can be larger and more expressive, with tiny hearts piped around them to emphasize the love theme.
- Fluffy Mane: Create a fluffy, romantic mane using buttercream in shades of pink, red, and gold. Piping small, delicate rosettes or curls will make the mane look soft and luxurious.
- Decorative Elements: Add mini fondant hearts, chocolate truffles, or a “love” message around the cake. You can also use edible rose petals or red sugar crystals to make the cake feel extra romantic.
- Fun Additions: Decorate the cake with edible glitter or dusting powders for a magical, shimmering effect. Small heart-shaped sprinkles or edible pearls can be scattered over the top for extra flair.
5. New Year’s Eve Unicorn Cake: Sparkling and Glamorous
New Year’s Eve is a time for celebration, glitter, and glamour, and what better way to ring in the new year than with a stunning unicorn cake that sparkles and shines? For this occasion, go all out with metallic colors, bold glitter, and festive touches that feel as glamorous as the countdown to midnight.
- Why It Works: New Year’s Eve is all about celebrating with style, and a unicorn cake with plenty of shimmer and sparkle matches the festive, glamorous atmosphere. Metallic tones and glitter add a sense of luxury, making the cake feel like a celebratory work of art.
- How to Make It:
- Metallic and Bold Colors: Use gold, silver, and black buttercream or fondant to create a striking contrast. The unicorn’s horn can be metallic gold or silver, covered in edible glitter for extra shine.
- Glamorous Ears and Eyes: Add sparkle to the unicorn’s ears and eyes by using edible gold dust or silver accents. A glittery bow or small metallic star on the horn will enhance the glam look.
- Glittery Mane: For the mane, use buttercream in jewel tones like deep purple, gold, or silver, and add edible glitter or star-shaped sprinkles to make the cake shine.
- Decorative Details: Add sparklers or edible fireworks as a topper, or use metallic confetti to decorate the cake. You could even add fondant champagne bottles or glasses to celebrate the occasion.
- Fun Additions: Use edible gold leaf, sparkling sugar, or glittery confetti to make the entire cake shine, ensuring it’s as festive as the New Year’s Eve celebration itself.
Final Thoughts: Celebrate with a Magical Holiday Unicorn Cake
Holiday unicorn cakes bring a whimsical and magical twist to any festive occasion, from the cozy warmth of Christmas to the spooky fun of Halloween. By adapting the unicorn design to reflect the unique colors, themes, and spirit of the holiday, you can create a cake that not only tastes delicious but also delights guests with its creativity and charm. Whether it’s the glimmer of Christmas lights, the spooky atmosphere of Halloween, or the festive energy of New Year’s Eve, unicorn cakes can be transformed to fit every season with ease and style.
Adult Celebrations: Sophisticated Designs with Gold Accents or Minimalist Details
When it comes to adult celebrations, such as milestone birthdays, anniversaries, or other significant life events, the cake design should reflect the refined tastes and elegance of the occasion. While unicorn cakes are typically associated with whimsy and youthful charm, they can easily be adapted to suit a more sophisticated theme. Using clean lines, subtle details, and high-end finishing touches, you can create an adult-worthy unicorn cake that is both striking and stylish. The key is to balance the magic and wonder of unicorns with an elegant, adult-friendly aesthetic.
1. Elegant Color Palettes: Neutral Tones with a Touch of Glamour
For adult celebrations, it’s best to move away from the bold, pastel colors often associated with unicorn cakes and opt for a more sophisticated, subdued color palette. Soft neutrals like ivory, champagne, soft taupe, and muted blush work beautifully for these occasions, as do darker hues such as deep navy, emerald green, and charcoal. These colors lend a more refined and mature feel to the cake, while still maintaining a touch of magic.
- Why It Works: Neutral tones are timeless and versatile, making them ideal for formal or semi-formal adult events. By incorporating these shades into your unicorn cake design, you can ensure that the cake complements the overall decor and tone of the celebration without overshadowing it. Adding subtle touches of metallics or pastels can inject just the right amount of whimsy without making the cake feel too youthful.
- How to Make It:
- Base Layer: Frost the cake in a smooth layer of neutral-colored buttercream, such as a soft ivory or light gray. This base color will provide a sophisticated backdrop for other decorative elements.
- Mane and Horn: Consider a sleek, metallic finish for the unicorn horn, using fondant or modeling chocolate in gold, silver, or bronze for an upscale, elegant look. For the mane, stick to monochromatic or gradient color schemes, such as shades of white, champagne, or muted pastels, to keep the design refined.
- Minimalist Accents: Add small, minimalist accents to the cake’s design, like delicate piping, soft textures, or geometric patterns. These accents should enhance the overall aesthetic without overwhelming it.
- Fun Additions: If you want a bit of extra glam, you could add edible metallic gold or silver leaf to the cake, especially along the horn or around the base, to give it a high-end, luxurious feel. A hint of shimmer from edible glitter or dust can also be added to the mane or cake top for subtle sparkle.
2. Gold Accents: Luxurious Touches for a Glamorous Cake
Gold is a symbol of luxury, elegance, and sophistication, making it the perfect accent for adult unicorn cakes. Whether it’s a simple golden unicorn horn, delicate gold leaf, or gold detailing in the mane, these accents can elevate the cake and make it the focal point of the celebration.
- Why It Works: Gold accents add a touch of refinement and opulence, which is ideal for adult celebrations. Gold is universally associated with high-end decor and glamorous events, and its presence on a cake can elevate the entire atmosphere of the party. When used sparingly and strategically, gold enhances the elegance of the design without overwhelming it.
- How to Make It:
- Golden Unicorn Horn: Craft the unicorn horn using fondant or modeling chocolate and brush it with edible gold dust or paint to give it a rich, metallic finish. A gold-accented horn will stand out beautifully against the neutral base of the cake.
- Gold Leaf or Edible Metallic Dust: Apply edible gold leaf or dust to the cake’s surface in areas that need emphasis, like around the unicorn’s eyes or as a subtle border along the cake’s tiers. This adds a luxurious shine and brings attention to the cake’s key features.
- Gold Embellishments: For an added touch of luxury, you can use gold ribbon, gold-painted flowers, or golden piping along the edges of the cake. This minimalistic approach ensures the gold looks tasteful and sophisticated, without being too overpowering.
- Fun Additions: For a real wow factor, try incorporating gold-colored edible pearls, sequins, or metallic sprinkles around the base of the cake or on the unicorn’s horn. These small touches can add a dazzling effect without detracting from the overall minimalism.
3. Minimalist Design: Understated Beauty with Clean Lines
For adult celebrations, a minimalist approach can be incredibly effective, as it offers a sense of sophistication and modernity. Think of clean lines, simple but striking shapes, and a focus on negative space. A minimalist unicorn cake doesn’t need to be overly complicated or crowded with excessive decorations—instead, it should showcase beauty through simplicity.
- Why It Works: Minimalism focuses on quality over quantity. By eliminating excess and focusing on the essential elements of the design, you create a refined and timeless look. This style also allows the cake to be the centerpiece of the event without taking away attention from other important elements of the celebration.
- How to Make It:
- Sleek, Smooth Finish: Use fondant or buttercream to create a sleek, smooth cake surface. A smooth buttercream or fondant finish, free from excessive texture, will help keep the design feeling clean and polished.
- Simple Unicorn Features: Keep the unicorn’s features simple and minimal. Use a small, elegant horn made from gold or silver fondant, with no added embellishments. The ears can be delicately formed from fondant or even left as simple, smooth shapes.
- Refined Mane: Instead of creating a voluminous, colorful mane, opt for a few clean swirls or small geometric elements to represent the mane. A few subtle twists of fondant or buttercream in muted tones, or a slightly abstract pattern, will keep the design minimalist yet beautiful.
- Fun Additions: A minimalistic cake can still be elevated with a few key touches. Try adding a single, small fondant flower, a single edible pearl, or a geometric pattern piped in silver or gold. These small details can make a big impact without overwhelming the cake’s sleek design.
4. Geometric and Abstract Patterns: Modern Unicorn Designs
For a truly contemporary twist on the unicorn cake, incorporate geometric or abstract designs into the decoration. These patterns can take the form of sharp lines, hexagons, chevrons, or even minimalistic watercolor effects. These modern patterns add a creative and stylish element to the cake while keeping the overall aesthetic clean and sophisticated.
- Why It Works: Geometric and abstract patterns are synonymous with modern design, and they offer a fresh take on the traditionally whimsical unicorn theme. These designs are visually striking, yet they maintain an air of elegance and refinement, making them perfect for adult celebrations.
- How to Make It:
- Geometric Horn: Instead of the traditional spiraled unicorn horn, consider creating a geometric version using fondant. The horn could be in the shape of a faceted diamond or a sleek, triangular design, and it could be brushed with metallic gold or silver for a luxurious touch.
- Abstract Mane and Details: For the unicorn’s mane, use abstract, flowing shapes with a simple color palette. You could create geometric patterns on the sides of the cake using edible paint or fondant, or even try a marbled buttercream effect that incorporates soft, neutral tones with metallic accents.
- Abstract Decorations: Use small, subtle decorations like fondant circles, lines, or abstract brush strokes to create a visually interesting design. This approach adds depth and texture to the cake without detracting from its minimalist nature.
- Fun Additions: To emphasize the modern look, add a few metallic accents, like brushed silver or gold paint, or metallic sprinkles. These minimal embellishments keep the design fresh and sophisticated, aligning with current cake design trends.
5. Personalization with Elegance: Customizing for Special Occasions
Adult celebrations often involve milestones, such as birthdays, anniversaries, or corporate achievements, and personalizing the cake for the occasion can make it even more special. A minimalist design with personalized elements ensures that the cake feels tailored to the celebration while maintaining sophistication.
- Why It Works: Personalizing a cake with the celebrant’s name, event date, or a message adds sentimental value. When done in a minimalist way, these personal touches don’t overpower the design but instead enhance its overall elegance.
- How to Make It:
- Elegant Font: Use a modern, elegant font to write the celebrant’s name, event date, or message. Piping or painting the text in gold, silver, or black ensures it blends with the minimalist design.
- Personalized Topper: Opt for a subtle topper, like a fondant figure or custom acrylic piece with the event’s name or theme. The topper should be simple and elegant, without being too flashy.
- Subtle Additions: For a refined touch, add a fondant plaque with a quote or a decorative border with initials or a date.
- Fun Additions: Personalized fondant decorations, like monograms or initials, add a polished touch to the cake’s sophisticated style.
Final Thoughts: Elegant Unicorn Cakes for Adult Celebrations
Unicorn cakes can be adapted for adult celebrations with minimalist designs, metallic accents, and personalization, blending magic with elegance for birthdays, anniversaries, or special occasions. The key is to balance whimsical elements with sleek, clean lines, ensuring the cake enhances